Tuesday, November 6, 2012

When life gives you apricots...

This is an old post but is only just now being published. I apologize for the delay.

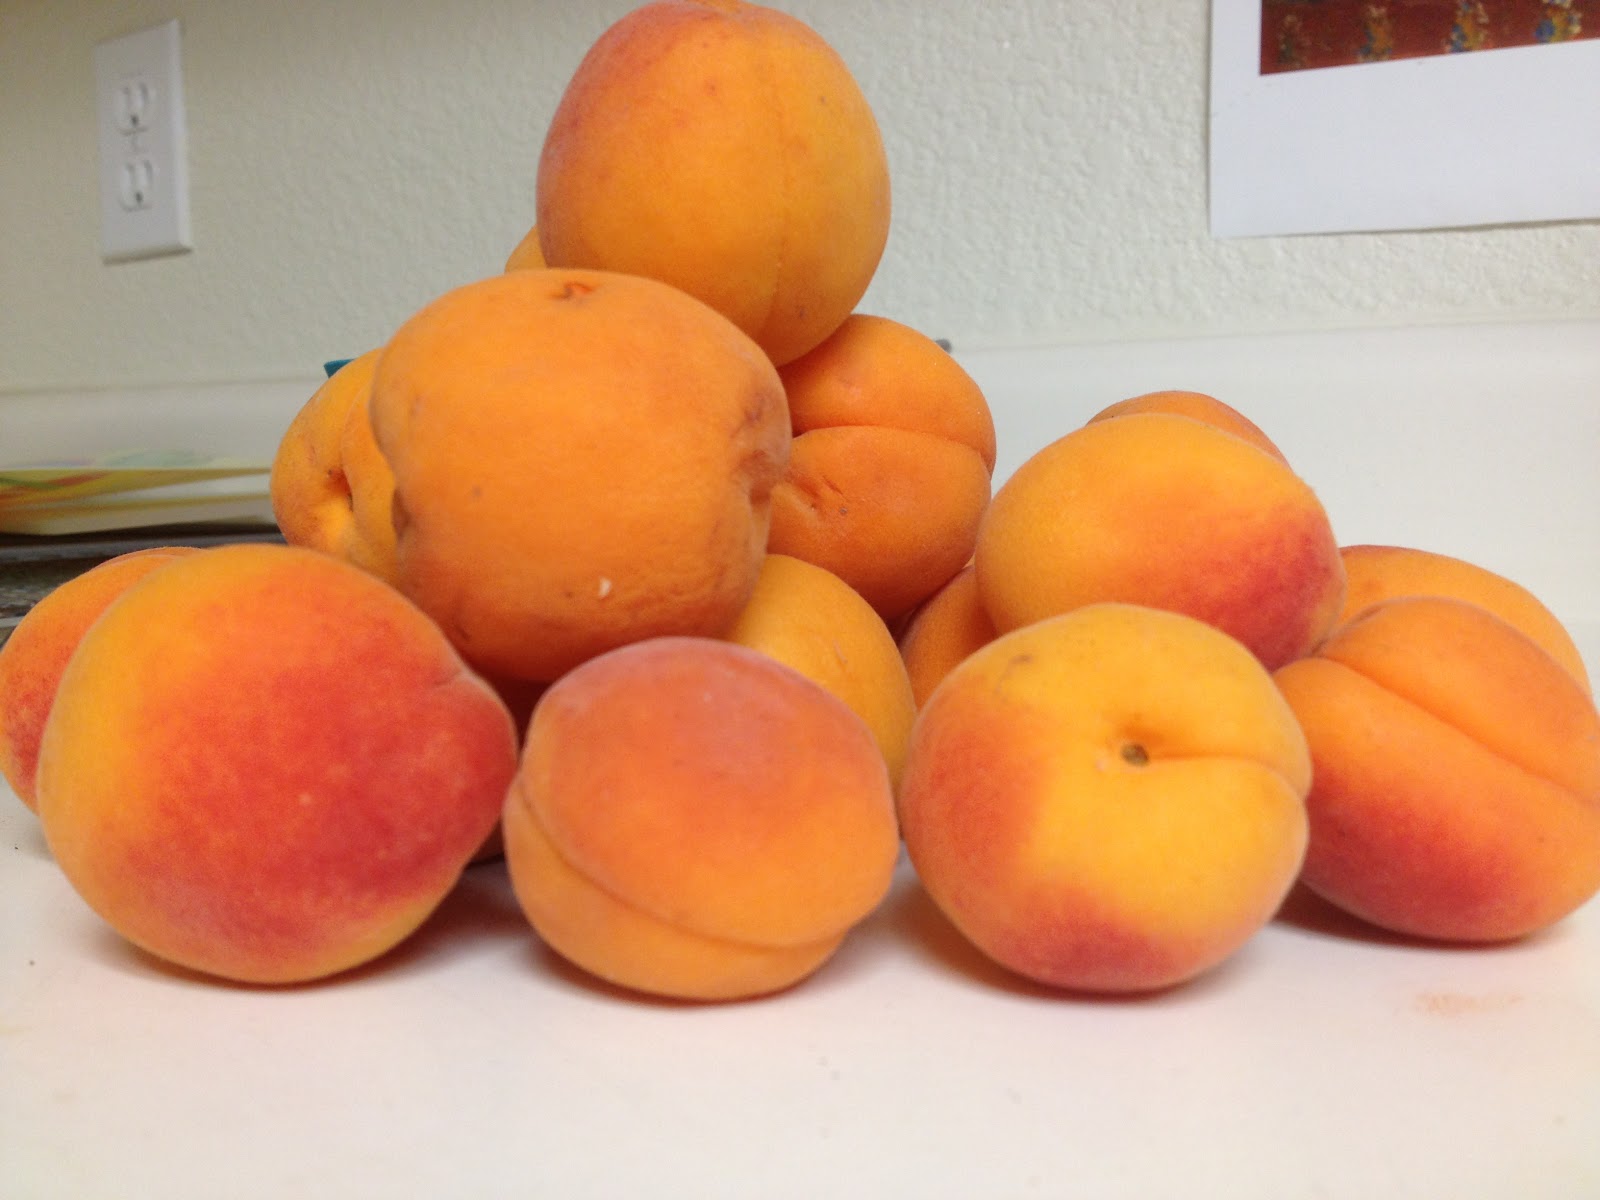
My boss has an apricot tree. It's getting a little out of hand.


He's using 2x4s to keep the branches from breaking. This is the most delicious problem I've ever heard of.

He was more than happy to bring me a bag of apricots, and I was more than happy to take them.


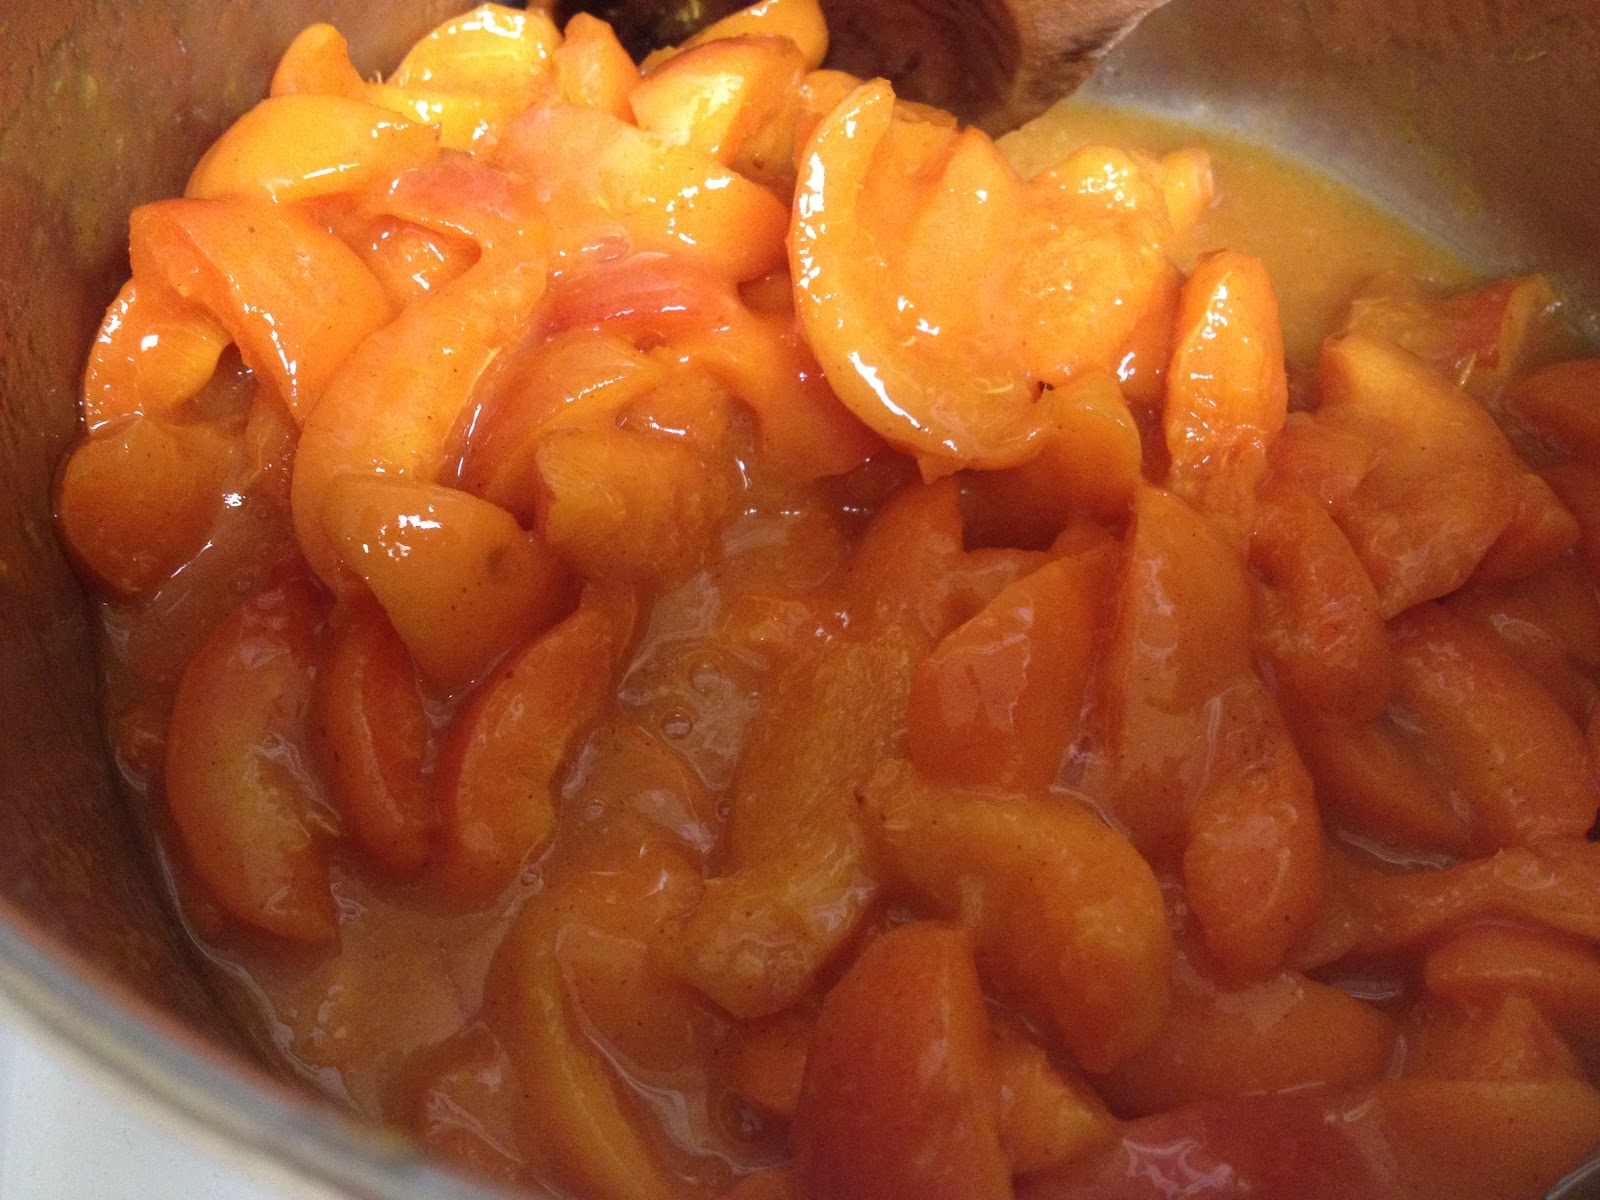
After scarfing a few (and trying not to get the juices everywhere), I did some quick chopping — just enough to remove the pits, but not the skins. I threw the quartered apricots into a saucepan, added white sugar, cornstarch (for thickening), and a little bit of cinnamon. Then I brought the mix to a boil, stirring and scraping a lot to make sure all that sugar didn't burn on the bottom.


When it had thickened, I removed it from the stove top and let it site to cool a little bit.

In a bowl I started the cobbler crust with all the good stuff: sugar, flour, butter, and cinnamon. (And baking powder to make it rise.) Yum.


I am fancy and used a pastry cutter to slice the butter into the flour mixture until it was crumby (but not blended like cookie dough). There is a fine art to crusts like this that I have neither mastered, nor am able to describe, but you're aiming for a mixture that isn't entirely one piece, but doesn't have a lot of flour dust floating around either. That is, you should be able to see where the butter hasn't combined with the flour (ie, there are cubes of butter hanging around), but most of the flour should stick to the butter.

I believe I've totally confused you. Carry on, and let's pretend like that last paragraph didn't happen.


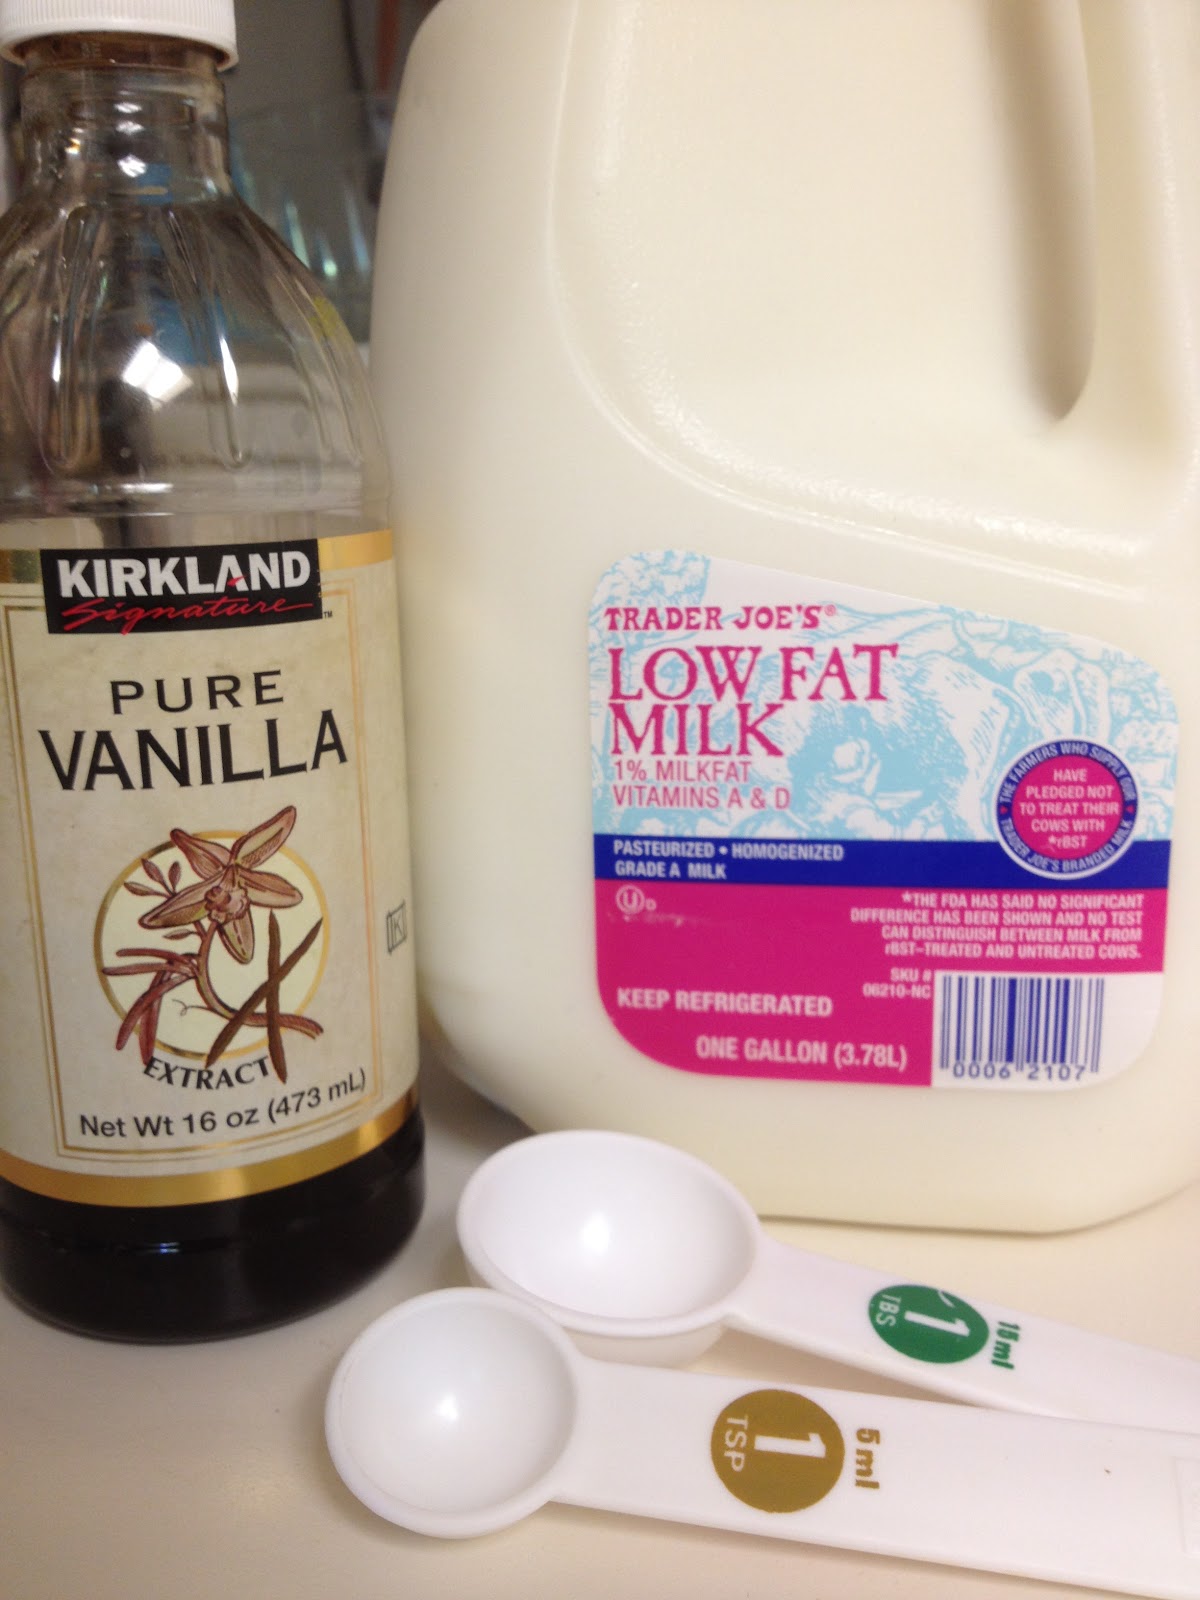
With the cobbler crust crumbed, I added milk and mixed it all together. Now the crust was gooey and gross. And delicious.


The thickened apricots (and sugar) went into the bottom of a nine inch cake pan. Then they were joined by the crust, which I dropped in pieces rather unceremoniously on top. (Be assured, this is what you are meant to do.)


I covered the entire thing in a pleasant glaze of sugar because I hate my waistline and want to give people I know diabetes. Then I stuck it in the oven and the entire house smelled like yumminess.


The final result was a deliciously tart cobbler. The crust rose a little and spread across the entire pan, despite having gaps in it before baking. I took it to work and my coworkers scarfed it all down. A good team effort between my boss and myself, no?

You can find the recipe from Betty Crocker here. Just replace the peaches with apricots and you're ready to go!

Monday, November 5, 2012

Baking soda bonanza

Friends, I am a fiend for cleaning things so long as they're in the public view. I do not keep my bedroom tidy. It looks like the bedroom of a six-year-old boy with a mild case of ADHD. But my kitchen, living room, and dining room I like to keep clean in case the president comes over. (It could happen, you don't know it won't.)

Recently I moved into the most adorable little apartment. It has hardwood floors. It has the most adorable little built-ins where we store our alcohol like classy, employed folk. It has a fireplace. It has a pantry with a hook in it from which you are meant to hang an apron. I died the first time I saw it. And now that I am dead, it is my heaven.

However, since I'm renting, there are a few things wrong because people don't feel the need to invest in maintenance while they live there. Tragically, this comes at the cost of the adorable bronze cabinet pulls in the kitchen. So I resolved to clean them.

The answer isn't 409 (85% of problems are solvable with 409) or Windex (my other standard cleaner). The answer is baking soda, salt, water, and scrubbing. Just look at this:


I feel like a serious blogger right now, recommending a home remedy like this, but look at the difference. Look at it. It's insanity. The one on the right is sticky and blackened by years of disregard, and the one on the left is clean. It's even a little shiny.

Here's how I did it: I dumped a bunch of baking soda into a bowl and stirred in some larger salt to help as an abrasive. Then I added just enough water to make a paste, et voila: homemade cleaner.

The brown/black stuff is what came off the pulls. Ewwwwwwww.
I unscrewed the cabinet pulls from the doors and scrubbed away, just covering them in the paste and the rubbing with my fingers, rinsing when I was done. I probably took about 5 minutes per pull, and I wasn't even scrubbing that hard.

So there you go, ladies and gentlemen. I've been converted to the cult of baking soda. You may consider this my first proselytization.

Monday, September 17, 2012

And she was very, very happy

This past weekend I got to go to a wedding with my boyfriend. This sounds pretty usual for someone in their 20s, but (because I overthink things), I see a little more in it.

Boyfriend and I have had a hellish summer. He had surgery early in the summer and I cared for him while commuting to work in another city. He managed to land a job and we managed to find a place to live. His recovery is turning out to be miserably long, and the doctor's orders to do nothing until he healed was driving us both a little nutty. We both needed a vacation.

We were invited to the wedding by the bride and groom (duh...), but the bride is my coworker. We were invited not out of obligation, but because in our company, we're all good friends.

I'm all too aware of how rare it is for a freshly-minted college grad to have a job, and so I thank my lucky stars every day that I have a job that not only pays me, but pays me to work with people I care for and actually like to hang out with. (Company picnics are no awkward affairs, but rather crazy fun bonding times).

This wedding, where I got to relax on the beach and kick back with my friends and boyfriend, really brought home how lucky I am. So thanks, coworker, for getting married. I know you said you were the happier girl in the world that day, but I know I was pretty darn happy too.


Also, my toenails were orange :)

Monday, September 10, 2012

Tourist trap

Yesterday I went out to Pier 39 with Boyfriend, his mother, grandmother, and the Blonde Bookworm. Yes, we trooped out to that wonderful, chilly, gaudy tourist trap and enjoyed some rare and gorgeous San Francisco sunshine.


What's great about the tourist trap is the ridiculous kitsch they sell. I will never tire of the glitter pink flasks with San Francisco emblazoned on the front, the shirts that copy the latest fashion (right now it's Run DMC), and endless shot glasses and spoons and keychains that are sold everywhere.

Here, for example, is Boyfriend wearing a large floppy hat:
I had to follow through on my threat to Instagram the image.
More importantly, I got Captain America socks.

Yeah I did.
I have to admit: I'm a bit conflicted about these. They're awesome and I adore them... but I am absolutely a bandwagon fan. I never read the comic books, and never got involved in the story of the Cap until the most recent movies. And while Boyfriend couldn't be happier that I'm excited about Captain America, I still haven't read the comic books.

So, my limited audience, I ask you: Can I wear these socks without being an Idiot Nerd Girl? Where is the line between enjoying a popular cultural icon and calling yourself a fan? If someone says I'm not a "true" Cap fan because I haven't loved him long enough, are they a Cap Hipster? THESE ARE IMPORTANT QUESTIONS.

Unexpected long post is unexpected. Food coming soon!

Tuesday, August 28, 2012

New inspiration

My dear readers, I have abandoned you. I apologize. I have had the craziest summer of my life between graduation, starting work full time, caring for Boyfriend as he recovered from surgery, and moving to another city.

But these are mere excuses.

I'm an avid Slate reader, and yesterday the writer Tracie McMillan offered a wonderful article on why we should all cook dinner always. Yes, it has to do with money, but more importantly, it has to do with responsibility:
"Just because [cooking] is a drag doesn’t mean we shouldn’t do it—we do things every day that are a drag. We take out the trash, we make our beds, we run the vacuum, we pay the bills. These are not lofty cultural explorations, but they are necessary, and so we do them anyway."
Part of the problem with blogging -- or even just reading foodie blogs or browsing Pinterest -- is that we feel pressure to create some new masterpiece that we can post on Instagram and impress our friends. I think we all need to make a better effort to nourish ourselves, rather than push ourselves to be more Martha than Ms. Stewart herself.

I will return soon. I'm moving to a new apartment with a better commute, and I'll have more time to bake and craft and blog. In the meantime, chew on this.

Sunday, June 3, 2012

Torta di ciliege — Italian cherry cake for summer

There are a few things that define summer to me: the smell of chlorine and sunscreen, warm nights and a cool breeze, barbeque and laughing children, and torta di ciliege. (According to my Italian elementary school teacher, that's pronounced "TOR-ta dee chill-YAY-jee.")

When I was a kid, cherries were my favorite fruit, so when my mom found the recipe for this cake in our local newspaper, I'm sure she thought it was heaven-sent. It's light, eggy, and great for dessert or breakfast or midday snack. And yes, this has been my birthday cake once or twice!

A bit of a forewarning: the recipe says the "cake is as easy to make as it is delicious to eat," but I think any recipe that has you separate eggs isn't easy. That being said — on to the blow-by-blow!

First up, cream together butter and sugar until they're fully combined.


Is there any better combination that butter and sugar? Ladies and gentlemen, I sincerely doubt it.

Here's the hard part: Separate the eggs.


Add the yolks to the butter and sugar one by one, mixing the yolk in entirely before adding the next yolk. Put the whites in a separate bowl — don't get rid of them!

By now it's a fun yellow color from the yolk. Add milk and pure vanilla extract.


Add flour and baking soda. If you have the tools to sift flour, do it: Sifting will make the cake extra fluffy, but don't worry about it if you don't have the ability. I didn't sift my flour and it turned out just fine.

When the flour is all mixed in, go back to the bowl of egg whites and beat them until they're fluffy and form soft peaks, like this:

Please don't try and beat the egg whites by hand. It's really, really hard. Use an electric beater or mixer.

Once the egg whites are forming those lovely soft peaks, scoop about a quarter of the egg whites out and mix them into the batter. Then fold the rest of the egg whites in. Do this by stirring from the top of the bowl to the bottom instead of around the sides of the bowl. Do this gently so you don't flatten the egg whites.

Pour the cake batter into a springform pan and set it aside. Pull up a bowl of pitted cherries and add a few tablespoons of sugar (use 2 tablespoons if the cherries are sweet; 4 tablespoons if the cherries are a little bitter).


To be fair, pitting and sugaring the cherries is something that can be done ahead of time, but then you have the problem of roommates coming and eating all the cherries in the bowl while your hands are full with the batter. If you can set a guard about the fruit and know they'll be safe, then by all means prep ahead of time!

At any rate, when the batter is in the pan, pour the cherries on top of the batter as evenly as you can.


As the cake bakes, the batter will rise up around the cherries, and the cherries will sink down and be distributed throughout the cake. Or you can be impatient like I was and push on the cherries, and they'll all end up at the bottom. Either way, pop it in the over for an hour and once it's cooled, the cake is delicious!


Excuse me, I'm going to go get myself another slice. In the meantime, here's the recipe!

Torta di ciliege, from In Nonna's Kitchen by Carol Field
Ingredients
0.5 cups unsalted butter (one stick)
0.75 cups sugar
3 eggs, room temperature, separated
3 tablespoons milk
1 teaspoon vanilla extract
1 cup flour
1.5 teaspoons baking powder
Pinch of salt
1 pound meaty, dark ripe cherries, pitted
2 to 4 tablespoons sugar

To make
1. Preheat oven to 350 degrees; butter and flour a 9.5 inch springform pan.
2. Cream butter and sugar until light and fluffy.
3. Add egg yolks one at a time, beating thoroughly after each addition.
4. Stir in milk and vanilla.
5. Mix together the flour and baking powder, then sift into the bowl.
6. In a separate bowl, beat the egg whites with a pinch of salt until they form soft peaks.
7. Stir a quarter of the egg whites into the batter, then carefully fold in the rest.
8. Spread the batter into the springform pan. It will come halfway up the sides.
9. Combine the cherries and sugar, then spread them over the top.
10. Bake for 50 to 60 minutes, until the top is golden and a testing knife comes out clean.
11. Cool in the pan for 15 to 30 minutes, then unmold onto a rack to cool completely.

As a surprise addendum, the newspaper included nutritional information with the recipe! One cake has eight servings, and each serving has 381 calories, 6 grams of protein, 49 grams of carbohydrates, 18 grams of fat, and 159 milligrams of sodium. I hope you enjoy the cake anyway!

Tuesday, May 8, 2012

You can take the girl out of the research university...

Gentle readers, it's with great shame that I admit this fact to you: I am not a big fan of doing research. I don't just mean googling furiously to find the source of a picture, or plunging through records of political science journals to learn more about how State of the Union addresses affect public opinion polls. No, I am not a fan of testing hypotheses through experimentation or polling, then crunching numbers.

I thought I wasn't cut out to be a researcher until a project at work led me to this graph:

Rankings courtesy of AppAnnie.com; additional analytics are my own work
Well that looked weird, I thought to myself. Downloads for the Monster.com app peak on Wednesdays and drop drastically on the weekends. And then I suddenly understood the "research bug." I need to know more about this trend. I need to know if app downloads correlate to anything else.

So whenever I have time, I'll be researching the link between job-searching apps and the economy over time. I might even look at how popular game apps fit into the picture. Who knows? It's a brand new world in so many ways: As TechNet put it, "there are now roughly 466'000 jobs in the 'App Economy' in the United States, up from zero in 2007." And while the world of research isn't new to me, the idea of loving it is.

Of course, I will be posting my results whenever I have them. Just keep in mind that I am transitioning from college student to A Real Adult, and I might not have a lot of time to dedicate to number crunching. I hope this post has gotten you as interested as I am!

Thursday, May 3, 2012

Nerdsanity

After teasing us for years with superhero movie after superhero movie, The Avengers is coming out tonight at midnight. Last night, I tried to distract myself from my impatience by making myself a shirt to wear to my first viewing. You can do it too! All you need is bleach, a spray bottle, contact paper, and a dark-colored shirt. (Or pants, if you wish.)

I got see-through contact paper so I could see the design underneath while I used an Xacto knife to cut away where the bleach would go.


I blew up a SHIELD (Strategic Hazard Intervention Espionage Logistics Directorate, or, depending on whom you ask, Strategic Homeland Intervention, Enforcement and Logistics Division) logo I found online. After cutting out the entire design, I took off the paper backing and stuck the contact paper on top of the shirt. I slipped a few sheets of newspaper inside the shirt to keep the bleach from getting on the back side of the shirt.

I spritzed bleach on the shirt and dabbed at it with a paper towel to keep the bleach from spreading through the fabric and under the contact paper.


I put cardboard around the contact paper to keep the bleach away from the fabric. I repeated the spritzing and dabbing twice more.

After the front dried, I flipped the shirt over and repeated the process and put another design on the back.


I was a little overzealous with the bleach here, and the stars got a little obscured because I put too much bleach and it bled into the fabric.

Final product was more red than bleached-out tan, but I like it. I'm happy with the result, and it really didn't take a lot of time. If you do it yourself, be patient and it will turn out well.


Not enough nerd for you? Here's a bonus: LEGO is coming out with an Avengers series. Sadly, the average play set is around $20, and since I can get about four meals for the same price and I have to prioritize, I'll only be lusting after these sets from afar.

But the posters are awesome.


Thursday, April 19, 2012

Lazy food

My dear friend Katie is a go-getter. She has a more-than-full-time job, is finishing up her master's degree, and still finds time to exercise. Over at her fabulous blog she's keeping track of how many miles she runs and all the healthy food she's making to help her stay in shape. She's even persuaded me to do a 5K run in August called The Color Run. I only agreed to it because it's actually a "run/walk," it's short (she's persuaded others to do marathons with her. Ha!), and because as we run, we're basically going to get tie-dyed. Awesome.

Even though I ought to be training for this run, spring has hit California strongly, and all I'm inspired to do is curl up and take naps in the sun like a cat. When it comes time for dinner, I'm lacking the inspiration necessary to take on big dishes that require a lot of cleaning afterward. So I introduce to you one of my favorite lazy meals: The sort-of burrito.


Melt cheese between two corn tortillas, slather some refried beans on top, add salsa, sour cream, and any other toppings you enjoy. (Olives and chopped lettuce are great, but I haven't been grocery-shopping in a while. Like I said, I've been lazy!) Fold it in half and nom away.

I'm not entirely sure who my audience is here, and if you're reading this thinking, "I'm a real adult and I need real meals!" then I say to you: Enjoy this as a snack or lunch instead of dinner.

To those of you reading this thinking, "Oh man. I'm hungry but don't have tortillas or cheese or anything except cereal" I say: Rock on. College is fun.

I enjoyed this particular meal with a glass of Two Buck Chuck because, well... college is fun.

(Longer blog post coming this weekend.)

Wednesday, April 11, 2012

Redux: The most luxurious cake ever made

Before I start, I want to apologize to any regular readers out there (do you exist?). My life has been crazy lately, and I've been struggling to keep up with the blog. I do have a bunch of entries to type up... the words just aren't coming out! Expect a burst of new entries following this one, and I will try much harder to  stay more regular. Thanks for your patience!

Now, on to the food.

Way back when I started this blog, I wrote about one of my favorite cakes: Guinness and chocolate cake. It was delicious, but I didn't do a step-by-step and didn't take very good pictures. So if you'll forgive me, today I'm going to fill you in on the details of this cake. (And yes, because I'm posting it twice, it means you really, really need to make it!)

Start off with a Guinness.

Pop it open and pour a fluid cup into a small pot over a medium-hot stove. Add a cup of butter (two sticks) and stir slowly until combined. Pour the rest of the Guinness into a glass and drink it.

At this point I'd like to reassure those who are not fans of beer that you can hardly taste the beer at all (and I'm one of those people who can taste the alcohol in anything, despite others saying you can't). You should, however, definitely add the beer because it gives the chocolate this deep, extra-rich flavor that you can't get in a normal cake. So add the beer.


Add cocoa powder and let it all mix together until the butter is melted and you want to drink the mix straight from the pan. Remove the pan from the heat and let it cool a little.

In a separate bowl, mix together sugar, flour, baking powder, and salt. As always, I split the sugars and did half a cup of granulated sugar and half a cup of brown sugar.


Set the dry ingredients aside, and in yet another bowl, mix eggs and sour cream. Beat them together until they're smooth.


We ran out of sour cream while I wasn't paying attention, so we used plain yogurt and that worked just fine. If you want to substitute, do so but use caution.

Pour the chocolate-butter-beer mix into the sour cream and eggs and beat it. Try not to lick the chocolate from the pot; it'll probably still be hot.


Slowly add the dry ingredients until everything is fully combined and looks like cake batter.

Add some chocolate chips. You know you want to.

Pour the batter into two floured 9-inch pans, or into a paper-lined cupcake tins. I can never do this evenly and it always works out, so don't try too hard.


Bake for about 30 minutes (if you're using cake pans). Check and see if the center has baked before you pull it out; if a toothpick or fork is inserted into the center and pulls out clean with no crumbs on it, then the cake is done and you should pull it out. Let the cakes cool on a wire pan. Try not to eat them.

Now for the Bailey's ganache. Sometimes I've been lazy and skipped this part, but every time I take the time to make it, I wonder why I ever thought I could go without it. So do it.

Heat heavy cream in a pot or in the microwave until it's simmering. Pour the cream over chocolate chips and let it sit for about 2 minutes. Seriously, don't touch it. This will ruin it.

When you can't take it any longer, stir the chocolate and cream. The cream will have melted the chocolate a little, and mixing will give it the extra friction to finish melting. At some point, throw a little butter in.


Pour in the Bailey's cream and continue to mix. If the chocolate hasn't melted all the way, stick it in the microwave in short 15 second bursts. When it's finished, the ganache should be shiny and smooth. Stir it occasionally as it cools so it cools evenly.

While the ganache and cake are cooling, whip up some frosting with butter, heavy cream, powdered sugar, a tiny bit of vanilla, and Bailey's cream. Because I was making this for St. Patrick's Day, I added food dye for funsies. (If you're a teetotaler, you can definitely skip the Bailey's in this... but it's just not as tasty!)


Once the cake had cooled, I poured the ganache on top of half the cake and smoothed it out, leaving a little bit of space around the edge so it wouldn't squirt over onto the side of the cake.


I put parchment paper around the edges to catch any frosting spills and crumbs. This is a good trick to having a clean and presentable plate without wiping your finger along the plate (which also works, but this is easy!)

I very gently eased the top half of the cake on top of the ganache and applied a "crumb coat" of frosting.


This catches all the annoying crumbs that get mixed up in your frosting. Applying a second coat of frosting makes the cake look smoother and the colors more vivid. The crumb crust doesn't have to be very thick — it's just there to smooth over the edges before the second coat goes on, much like a paint primer. After the second layer of frosting, I gently pulled the parchment paper out from under the cake and cleaned up any messes I had left around the plate.


I added orange sprinkles around the edges to make it Irish, and added "sláinte" (Gaelic for "health" or "cheers" or whatever you yell when drinking) and a shamrock for extra fun.

We don't have any more glamor shots of the cake because we ate it too quickly, but I can promise you that it's deeply rich, chocolatey, and amazing.

P.S. Remember how my roommate hates cake and sugar in general? Yeah, she loves this cake. A lot. She even texted me to say "that cake is one of the most beautiful things I've ever tasted."

Again, thanks to Annie's Eats for the recipe:

Guinness and chocolate cake with Bailey's buttercream frosting
Ingredients:
For the cake:
1 cup Guinness (or other) stout
1 cup unsalted butter
0.75 cups unsweetened cocoa powder
2 cups flour
2 cups sugar (1 cup brown sugar, 1 cup granulated)
1.5 teaspoons baking soda
0.75 teaspoons salt
2 large eggs
0.66 cups sour cream
1 cup bittersweet chocolate chips
For the ganache:
1 cup bittersweet chocolate, finely chopped
0.66 cups heavy cream
2 tablespoons room temperature butter
2 teaspoons Bailey's Irish cream (or more!)
For the frosting:
1 cup unsalted butter
5 cups powdered sugar
6 tablespoons Bailey's Irish cream
Splash of vanilla

To make:
For the cake:
1. Preheat oven to 350F.
2. Combine the stout and butter in a saucepan over a medium-hot stove and stir until melted.
3. Add the cocoa powder and whisk until combined. Set aside.
4. In a separate bowl, mix the flour, sugar, baking soda, and salt. Set aside.
5. In a large, separate bowl, beat the eggs and sour cream together until smooth.
6. Pour in the stout, butter, and cocoa mixture and mix it all together.
7. Slowly add the dry ingredients until combined.
8. Add chocolate chips, if adding them.
9. Pour into floured cake pans or papered cupcake tins and bake for 30 minutes (for cake pans) or 17 minutes (for cupcakes), or until a toothpick comes cleanly out of the center.
10. Let stand for 5 minutes, then tip out of the pan and allow to cool on a wire rack.
For the ganache:
1. Heat heavy cream in a pot or in the microwave until it's simmering.
2. Pour the cream over chocolate chips and let it sit for about 2 minutes.
3. Stir the chocolate and cream together to finish melting the chocolate.
4. Add butter and Bailey's. Stir until silky. If the chocolate has not completely melted, microwave it for very short bursts of time.
5. Set aside to cool. If you refrigerate it, stir it occasionally to ensure even cooling.
For the frosting:
1. Beat butter until smooth.
2. Add powdered sugar slowly, alternating with splashes of heavy cream, Bailey's, and vanilla until the frosting reaches the consistency and taste you want.

Sunday, April 1, 2012

The birthday cake that wasn't a cake

Folks, my roommate is a quirky one and I love her for it. She owns a shirt with cats and lasers on it. She watches Twin Peaks with me. Her biggest quirk is that she doesn't like cake — which for me, is akin to not enjoy air. So for the most part, she's immune to all the goodies I bribe the rest of my housemates with. When her birthday rolled around, I had to wrack my brain to come up with something sweet (but not too sweet!) to tempt her with. The solution? Zucchini bread, disguised as cake. I opened my Martha Stewart Baking Handbook and set to work grating zucchini.


A couple things for the record:
1. Those are giant zucchini (zucchinis? zucchinum?) and a normal bowl, not a tiny bowl and normal zucchini. This is important because...
2. Those two zucchini gave me two cups of grated zucchini. If you don't have monster-size zucchini, I would use three zucchini, just to make sure you have enough.
3. Grating zucchini is awkward. Do it alone.


I grated the zucchini first so I could make the cake batter all at once. Plus, it's always good to have everything ready beforehand. On that note, I also used a mini Cuisinart to chop walnuts... but I forgot to take a picture of that, so you'll have to take my word for it.

I mixed two kinds of sugars, eggs, and vegetable oil in a big bowl to start the batter.


With that combined, I added baking powder, baking soda, salt, cinnamon, and flour, along with an eensy sprinkling of nutmeg (because nutmeg can be delicious in small quantities).

Blurry pictures are the best, right guys? Right?
After mixing these ingredients, I pretty much had the consistency of cake batter, but none of the deliciousness of zucchini bread, so then I added the zucchini and walnuts.

This isn't a cake, it's practically a salad.

I floured two cake pans and split the batter between the them. I tried to get a housemate to do a quick taste test before I popped it in the oven, and she said she didn't want to put the batter anywhere near her mouth. She'd soon change her tune, though.


I popped the cakes in the oven and let them bake for an hour and 15 minutes. They weren't quite baked through, so I left them in until I could pull a toothpick out cleanly, then let them cool on a wire rack. (Take them out of the pans when you're able to touch the pans without hurting yourself.)

Hello, gorgeous.
The whole house smelled like cinnamon wholehearted goodiness.

While I waited for the cake to cool, I mixed up some cream cheese frosting in my standing mixer: a cup of cream cheese, a cup of butter, a big splash of vanilla, a big splash of heavy whipping cream, and a few cups of powdered sugar. I can't tell you the exact amount because I basically beat the butter and cream cheese together then add powdered sugar, vanilla, and cream until it looks and tastes "right." I wanted stiffer frosting because it was going on the sides of the cake, so I went with more powdered sugar. Again, the recipe changes every time, but the basic ingredients remain the same.


I held some frosting in reserve and added black food dye to use it for decoration.

When the cake was finally cool, I put one layer on a plate and frosted the top to give the cake a frosting center.


Very, very carefully, I eased the second half of the cake on top of the frosting, trying to keep it from sliding around on top of the newly-frosted first layer.


Using a butter knife, I pushed the frosting over the edge to spread it as smoothly as possible around the sides, then filled in the top. Always start in the middle and go toward the edge when you're frosting.

When the frosting was as smooth as I thought I could make it, I took a toothpick and doodled out my design, inspired by Nedroid's Party Cat comic because a.) it's adorable b.) my roommate loves cats and c.) my roommate is always asking for a party. Boom. Done. (For moms out there: The comic is safe! Click away.)


Then I frosted over the design with the black frosting I made earlier, then used sprinkles to color in the cat's party hat. I even put little (hastily-drawn) cat paws all the way around the edge of the cake.


Et voilà! When we brought the cake out, Roomie screamed so loud I nearly dropped the cake. When we finally got her to stop jumping up and down over how cute it turned out, and then finally persuaded her to slice into the cake and chop up its adorableness, the success continued and she declared the cake delicious. (I'm not even exaggerating here for story-telling purposes. She was really overexcited about a Party Cat cake.) So there you have it, folks. Got someone in your life who doesn't like sweet things? Feed them this cake and it might just change their minds.

Also, Party Cat cake will be in your life.
P.S. Typing this up, I just realized I only put one set of whiskers on the cat. How sad! Maybe someone took off his whiskers off as a prank during a party?

Zucchini Cake or Bread
Ingredients:
2 cups grated zucchini (2 to 3 zucchini worth)
1 cup granulated sugar
1 cup packed brown sugar
1 cup vegetable oil
3 large eggs
3 cups flour
1 teaspoon salt
1.5 teaspoons baking powder
1.5 teaspoons baking soda
1 tablespoon cinnamon
1 cup chopped walnuts

To make:
1. Preheat oven to 350F, wash and grate zucchini, and chop walnuts. Set aside.
2. Mix both sugars, vegetable oil, and eggs in a large bowl.
3. Add flour, salt, baking powder, baking soda, and cinnamon and mix until thoroughly combined.
4. Add grated zucchini and chopped nuts. Stir.
5. Pour into floured or greased pans (either cake pans or bread loaf pans) and bake for about an hour and 15 minutes, or until a toothpick comes out clean after poking the cake.
6. Cool on a wire rack.
For the cake:
7. Mix together cream cheese frosting (1 cup cream cheese, 1 cup butter, 1 tablespoon vanilla 1 to 3 tablespoons heavy whipping cream, and about 4 cups powdered sugar).
8. Frost cake and decorate.