Showing posts with label bread. Show all posts

Sunday, April 1, 2012

The birthday cake that wasn't a cake

Folks, my roommate is a quirky one and I love her for it. She owns a shirt with cats and lasers on it. She watches Twin Peaks with me. Her biggest quirk is that she doesn't like cake — which for me, is akin to not enjoy air. So for the most part, she's immune to all the goodies I bribe the rest of my housemates with. When her birthday rolled around, I had to wrack my brain to come up with something sweet (but not too sweet!) to tempt her with. The solution? Zucchini bread, disguised as cake. I opened my Martha Stewart Baking Handbook and set to work grating zucchini.


A couple things for the record:
1. Those are giant zucchini (zucchinis? zucchinum?) and a normal bowl, not a tiny bowl and normal zucchini. This is important because...
2. Those two zucchini gave me two cups of grated zucchini. If you don't have monster-size zucchini, I would use three zucchini, just to make sure you have enough.
3. Grating zucchini is awkward. Do it alone.


I grated the zucchini first so I could make the cake batter all at once. Plus, it's always good to have everything ready beforehand. On that note, I also used a mini Cuisinart to chop walnuts... but I forgot to take a picture of that, so you'll have to take my word for it.

I mixed two kinds of sugars, eggs, and vegetable oil in a big bowl to start the batter.


With that combined, I added baking powder, baking soda, salt, cinnamon, and flour, along with an eensy sprinkling of nutmeg (because nutmeg can be delicious in small quantities).

Blurry pictures are the best, right guys? Right?
After mixing these ingredients, I pretty much had the consistency of cake batter, but none of the deliciousness of zucchini bread, so then I added the zucchini and walnuts.

This isn't a cake, it's practically a salad.

I floured two cake pans and split the batter between the them. I tried to get a housemate to do a quick taste test before I popped it in the oven, and she said she didn't want to put the batter anywhere near her mouth. She'd soon change her tune, though.


I popped the cakes in the oven and let them bake for an hour and 15 minutes. They weren't quite baked through, so I left them in until I could pull a toothpick out cleanly, then let them cool on a wire rack. (Take them out of the pans when you're able to touch the pans without hurting yourself.)

Hello, gorgeous.
The whole house smelled like cinnamon wholehearted goodiness.

While I waited for the cake to cool, I mixed up some cream cheese frosting in my standing mixer: a cup of cream cheese, a cup of butter, a big splash of vanilla, a big splash of heavy whipping cream, and a few cups of powdered sugar. I can't tell you the exact amount because I basically beat the butter and cream cheese together then add powdered sugar, vanilla, and cream until it looks and tastes "right." I wanted stiffer frosting because it was going on the sides of the cake, so I went with more powdered sugar. Again, the recipe changes every time, but the basic ingredients remain the same.


I held some frosting in reserve and added black food dye to use it for decoration.

When the cake was finally cool, I put one layer on a plate and frosted the top to give the cake a frosting center.


Very, very carefully, I eased the second half of the cake on top of the frosting, trying to keep it from sliding around on top of the newly-frosted first layer.


Using a butter knife, I pushed the frosting over the edge to spread it as smoothly as possible around the sides, then filled in the top. Always start in the middle and go toward the edge when you're frosting.

When the frosting was as smooth as I thought I could make it, I took a toothpick and doodled out my design, inspired by Nedroid's Party Cat comic because a.) it's adorable b.) my roommate loves cats and c.) my roommate is always asking for a party. Boom. Done. (For moms out there: The comic is safe! Click away.)


Then I frosted over the design with the black frosting I made earlier, then used sprinkles to color in the cat's party hat. I even put little (hastily-drawn) cat paws all the way around the edge of the cake.


Et voilĂ ! When we brought the cake out, Roomie screamed so loud I nearly dropped the cake. When we finally got her to stop jumping up and down over how cute it turned out, and then finally persuaded her to slice into the cake and chop up its adorableness, the success continued and she declared the cake delicious. (I'm not even exaggerating here for story-telling purposes. She was really overexcited about a Party Cat cake.) So there you have it, folks. Got someone in your life who doesn't like sweet things? Feed them this cake and it might just change their minds.

Also, Party Cat cake will be in your life.
P.S. Typing this up, I just realized I only put one set of whiskers on the cat. How sad! Maybe someone took off his whiskers off as a prank during a party?

Zucchini Cake or Bread
Ingredients:
2 cups grated zucchini (2 to 3 zucchini worth)
1 cup granulated sugar
1 cup packed brown sugar
1 cup vegetable oil
3 large eggs
3 cups flour
1 teaspoon salt
1.5 teaspoons baking powder
1.5 teaspoons baking soda
1 tablespoon cinnamon
1 cup chopped walnuts

To make:
1. Preheat oven to 350F, wash and grate zucchini, and chop walnuts. Set aside.
2. Mix both sugars, vegetable oil, and eggs in a large bowl.
3. Add flour, salt, baking powder, baking soda, and cinnamon and mix until thoroughly combined.
4. Add grated zucchini and chopped nuts. Stir.
5. Pour into floured or greased pans (either cake pans or bread loaf pans) and bake for about an hour and 15 minutes, or until a toothpick comes out clean after poking the cake.
6. Cool on a wire rack.
For the cake:
7. Mix together cream cheese frosting (1 cup cream cheese, 1 cup butter, 1 tablespoon vanilla 1 to 3 tablespoons heavy whipping cream, and about 4 cups powdered sugar).
8. Frost cake and decorate.

Friday, March 23, 2012

Things to be thankful for

Yesterday I turned in my last final of the term and I'm officially on spring break for one short, glorious week and a half. Well, I still have to go to work today, but as far as school is concerned, I'm on spring break! It's a little bittersweet, because this is my last spring break ever, but I have big plans to make it memorable. Surprisingly, these plans aren't "sit on my bum and watch Star Trek all day."

(Don't worry, this will get to food... eventually.)

One of the things I've been trying very hard to do during finals is be thankful for what I have. Finals and work stress really, really get to me in the worst way, so I've been trying to remind myself of the good things to help calm me down. I first thought of this when I was drawing a thank you card for some relatives that helped me out with spring break plans (and also to procrastinate on studying for finals, but mostly because I was grateful).

The secret to drawing awesome cards? Draw in pencil first, then ink it in with a gel/ballpoint pen.
When the ink is dry, erase pencil marks and fill in empty spaces.
 I am grateful that I have finals in the first place — I know so many people who can't afford college or are indebting themselves because they value a diploma so much. In this economy, in this world, I'm incredibly lucky just to be in school, be reading, and be taking classes I enjoy — even if they stress me out.

I'm incredibly lucky to be employed as I work my way through college, and even luckier to be employed somewhere that values creativity. (No, seriously: Check out this pitch my boss wrote!) Sometimes the commute can get me down, but then I'm treated to the most amazing skies and the drive doesn't seem bad at all. I mean, just take a look:


And of course, I'm thankful for my readers! You guys are awesome... even especially if you're my friend and I'm forcing you to read it!

I'm also thankful my mom taught me to make French toast, and I'm deeply thankful for this French toast, because it's freaking delicious. I use Semifreddi's cinnamon challah swirl as the base, but it's tasty with any kind of bread. Plain challah, Italian bread like pugliese or ciabatta, French bread, sourdough sandwich bread, cinnamon raisin bread — all kinds of bread are delicious. (I'm hungry, okay? Lists of food are forthcoming.)

First thing is to slice your bread. Thick slices are delicious but will need to be cooked for longer; thinner slices will cook more quickly.


I usually cook the whole loaf and eat the rest for breakfast later in the week. For each two slices of bread, you'll need one egg and a quarter cup of milk, so with 10 slices of bread, I mixed five eggs and a cup and a quarter of milk.


Beat the eggs and milk together as much as you can. If you don't have flavored bread, at this point you can add cinnamon and a little vanilla to the eggs (and nutmeg, if you like it!) to get sweeter French toast, or add dried basil and oregano for a savory version.

Pour a little egg and milk over the bread and let it soak in.


The thicker your bread and slices are, the longer it will take to soak in. My mom actually leaves bread to soak in eggs and milk overnight in the fridge in a 9 by 13 inch pan if she's using pugliese or baguettes. Challah absorbs liquid easily, so it doesn't need to soak too long.


Plop the bread on a medium-high skillet and let it cook. The key here is patience, patience, PATIENCE! When you're cooking French toast, you're essentially cooking an egg inside a slice of bread. Do not sear the outside and let the inside of the bread remain soggy.


Flip when one side is golden brown and looks like a cooked egg. Depending on your skillet heat, this will take about four minutes, but don't worry if it takes longer! If the outside is cooking but the inside is staying soggy, cover your skillet with tin foil (shiny side facing the French toast) to help it cook. When both sides are cooked, serve with real maple syrup and fresh fruit, your favorite jam or honey, or  you've made savory French toast, serve with sausage and lemon green beans.


Refrigerate any leftovers to enjoy later! Reheat and spread with peanut butter and jam. Make this French toast for the people in your life you're grateful for, and be thankful for all the delicious varieties of French toast you can make. I certainly am!

French toast
Ingredients:
Bread
Eggs (1 egg per two slices of bread)
Milk (0.25 cups per two slices of bread)

To make:
1. Whisk together milk and eggs.
2. Soak bread in egg/milk mixture.
3. Cook soaked bread on a medium-hot skillet. If the center isn't cooked through, cover the skillet with tin foil.
4. When both sides are cooked, serve with syrup, jam, or fresh fruit.

Monday, November 14, 2011

Return of the pesto bread

A week ago I wrote about my deep love of pesto, my failed attempt at making pesto bread, and how much I hate failing. When I fail at something, I have to keep trying at it until I give up or succeed. Tonight, I made my third attempt at bread, and this time I succeeded, with delicious, delicious results.

I knew the bread would at least rise after I mixed the yeast with warm milk and sugar. I microwaved the milk and used a candy thermometer to make sure it was 110°ish Farenheit. This is what the recipe suggested and in keeping with what the Internet seemed to agree on. It seems pretty obsessive to measure the temperature of the milk, and normally I wouldn't, but I really wanted the bread to turn out right.

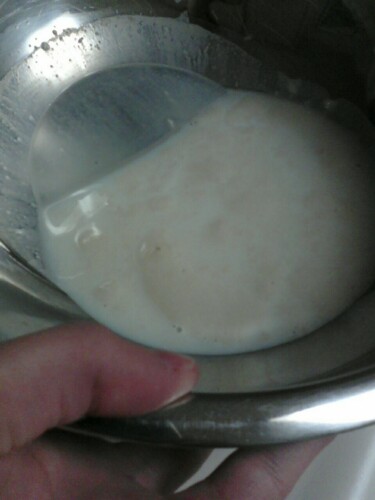
As you can sort of see in the picture, the yeast became kind of chunky and had a few bubbles in it after sitting for a little under ten minutes. It smelled kind of funny, and that's how I knew it was ready. This time I woke the yeast up without killing it. On to the next step!

I added the olive oil and salt and whisked it. I think I used too much salt and will probably use less next time. Then I added  flour by the half cup and mixed with a wooden spoon. I used half whole wheat flour and half all-purpose flour: I like using some whole wheat flour in recipes because I think it adds extra texture and flavor.
I kneaded in the last half cup of flour, making sure to turn the dough around as I kneaded to guarantee it was well-mixed.

(As a side note, kneading dough is one of my favorite parts of baking. I used to beg my mom to let me do it, and usually she would let me have at it, at least until she needed to get a move on and properly knead it. I was not a strong child. Also, kneading dough is about the best salve for an angry mood that I can think of. It's all about punching things. And then you get bread!)

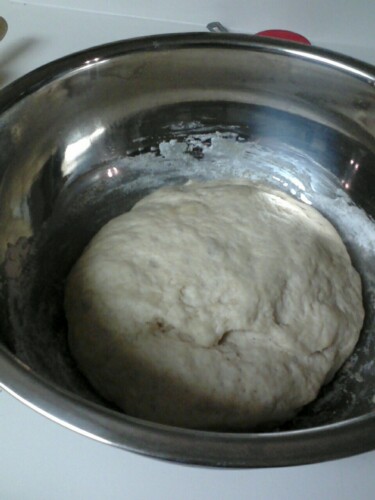
After the flour was incorporated I rolled it in a little olive oil, threw it in a bowl, covered it with plastic wrap, and went to Michael's for craft supplies with my roommates. (Lots of homemade Christmas presents in the works, which means lots of blog material for me. Phew!) When I came back, the dough had at least doubled in size.


Success! Since the dough had risen this time, I rolled it out on a floured countertop in an approximately rectangular shape and spread about a third of a cup of pre-made pesto sauce over the dough. (I used Trader Joe's Genovese pesto — if I had basil I would've made my own!) I can never say no to pine nuts/pinolis, so I sprinkled a handful of those on top as well. I covered this mix with about a half cup of parmesan cheese.
I folded the edges in then rolled the dough up like a jelly roll cake. I decided not to try and braid it like the recipe suggests, so I put it straight in a bread pan. I sprinkled a little parmesan on top for decoration.
I covered the bread and waited for about an hour to let it rise again while I went and ate dinner and watched an episode of Voyager and convinced my housemate that no one we know will die of Type 2 diabetes (unless, of course, they continue to eat what I'm cooking, but I left that part out).
When it rose back up I put it in the oven and baked for just barely under half an hour — the top was turning golden brown and I didn't want to crisp it. I put it on a metal rack to help it cool, and after about 45 minutes I dumped it out of the pan and sliced into it.


Delicious! And it's pretty attractive to look at, too!

End thoughts?
  • I need to be cautious when working with yeast.
  • Bread takes a lot of time. I was doing other things, but from start to the time I bit into it was probably about four hours. An oven is no bread machine, and I need to remember that.
  • I need to watch my salt content. I think I added too much salt in the beginning, and next time I will add less salt, and probably less olive oil, especially since there's so much in both pesto and the parmesan.
  • Next time I'll try braiding the bread so it's more of a pull-apart style, and maybe using mozzarella cheese instead of parmesan.
  • I'm really bad at photographing food. (But I'll get better!)
Here's the recipe, for those few following along at home. I wrote this one down a long time ago and don't know the source, but I certainly didn't invent it myself. Enjoy!
Pesto Bread
Ingredients:
Dough:                                             Filling:
1 cup warm milk                              1/3 cup pesto
2 tablespoons olive oil                      1/2 cup grated parmesan
1 tablespoon sugar
1/2 tablespoon salt
1/2 tablespoon dry active yeast
2 1/2 to 3 cups flour
    1. In a large bowl, combine warm milk, yeast, and sugar. Let sit for 10 minutes.
    2. Add the olive oil and salt.
    3. Add in a cup of flour and beat with a wooden spoon until smooth. Add in another cup of flour and do the same.
    4. Sprinkle a half cup of flour onto a flat surface and pour out the dough on top. Begin to knead and slowly add in more flour until the dough no longer sticks to the table. This will take about eight to 10 minutes of kneading.
    5. Add a little olive oil to a large bowl (about a tablespoon). Place the kneaded dough into the bowl and turn over a few times to lightly coat all sides of the dough.
    6. Cover with plastic wrap and allow to rest for an hour or until doubled in bulk.
    7. Pour out the dough onto a very lightly floured surface. Roll it out to a 9 by 14 inch rectangle.
    8. Spread the pesto on top of the dough and sprinkle the parmesan cheese on top.
    9. Bring in the side by a half inch and then roll the dough like a jelly roll.
    10. Pinch the seam closed. Take a sharp knife and cut the dough down the center length-wise, splitting the log in half.
    11. Open the roll exposing the inside of the roll. Take the two cut pieces and braid them together with the cut side always facing up.
    12. Place the bread into a greased bread pan. Cover the dough with plastic wrap and allow to rest for an hour or until double in bulk.
    13. Sprinkle the top with more parmesan cheese and place into a preheated 375F oven for 30 to 35 minutes.
    14. Check the bread about 10 minutes before it's finished to see if you need to cover with tin foil if they are getting too brown.
    15. Remove from oven and allow to cool on a wire rack.

      Monday, November 7, 2011

      A success and a failure

      First, the failure.
      Tonight, I tried to make pesto bread. It would've been awesome. I adore pesto, and the bread is essentially a basic bread, rolled out and covered in pesto, then braided, put in a pan, doused with parmesan, and baked. Yum!

      But alas, the dough never rose, even after trying with a second batch. Roommate said I should wait three days, and (after a lot of laughing) explained that after three days, Jesus rose from the grave, and maybe I should be a little more patient. I would honestly be really freaked out if I gave rise to holy bread, so I'll just stick with the "I'm a failure as a baker" idea.

      My current (non-supernatural) theories hypotheses on why the bread didn't rise are as follows:
      • The yeast was expired. There was no date on the yeast and one of my roommates just had the packet sitting around. When I try again, I'll try and get fresh yeast.
      • The milk was too hot and I killed the yeast (for the first time), or the milk wasn't warm enough and the yeast didn't wake up (for the second time around).
      This is my first attempt at making anything with yeast, and now I'm reminded why I was so intimidated by it. I'm determined not to be scared off, so once I bulk up on baking supplies, I'll return armed with fresh yeast and a candy thermometer to make sure whatever I'm soaking the yeast in is neither too hot nor too cold.

      Second, the success.
      My boyfriend is in a fraternity on campus, and they always assign pledges a "big brother" to help them through the process. Boyfriend got a little brother, which means I have yet another person to make fat with my efforts. The little brother's favorite kind of cookie is snickerdoodle, and I was pretty excited to make them because I've never made them before on my own.

      I used the basic Betty Crocker recipe for snickerdoodle (you can find it here if you don't have a cookbook), but ended up improvising a bit. I ran out of white sugar, so I used about a third of a cup of brown sugar and a third of a cup of powdered sugar in the actual cookies. I'm a big fan of using brown sugar in everything — it makes it softer, chewier, and (in my opinion) tastier, and to my relief it turned out nicely. I also used powdered sugar for the cookie coating, and it worked like a charm.

      Honestly, the only problem with this recipe is that it only makes two dozen cookies, and that is nowhere near enough! It is important to note that the recipe calls for both butter and shortening, and you do need cream of tartar, something I didn't have but one of my housemates did. Hooray for Housemate!

      Even if I couldn't figure out how to deal with yeast, I'm really happy the snickerdoodle turned out properly. I really don't like messing things up, especially when I'm baking. I forget that there are some things I just can't do, so while it's good to get a reminder, it's not exactly fun. Knowing how to fix the problem next time helps take the sting out of failure. And snickerdoodles definitely help!