There are a few things that define summer to me: the smell of chlorine and sunscreen, warm nights and a cool breeze, barbeque and laughing children, and torta di ciliege. (According to my Italian elementary school teacher, that's pronounced "TOR-ta dee chill-YAY-jee.")
When I was a kid, cherries were my favorite fruit, so when my mom found the recipe for this cake in our local newspaper, I'm sure she thought it was heaven-sent. It's light, eggy, and great for dessert or breakfast or midday snack. And yes, this has been my birthday cake once or twice!
A bit of a forewarning: the recipe says the "cake is as easy to make as it is delicious to eat," but I think any recipe that has you separate eggs isn't easy. That being said — on to the blow-by-blow!
First up, cream together butter and sugar until they're fully combined.
Is there any better combination that butter and sugar? Ladies and gentlemen, I sincerely doubt it.
Here's the hard part: Separate the eggs.
Add the yolks to the butter and sugar one by one, mixing the yolk in entirely before adding the next yolk. Put the whites in a separate bowl — don't get rid of them!
By now it's a fun yellow color from the yolk. Add milk and pure vanilla extract.
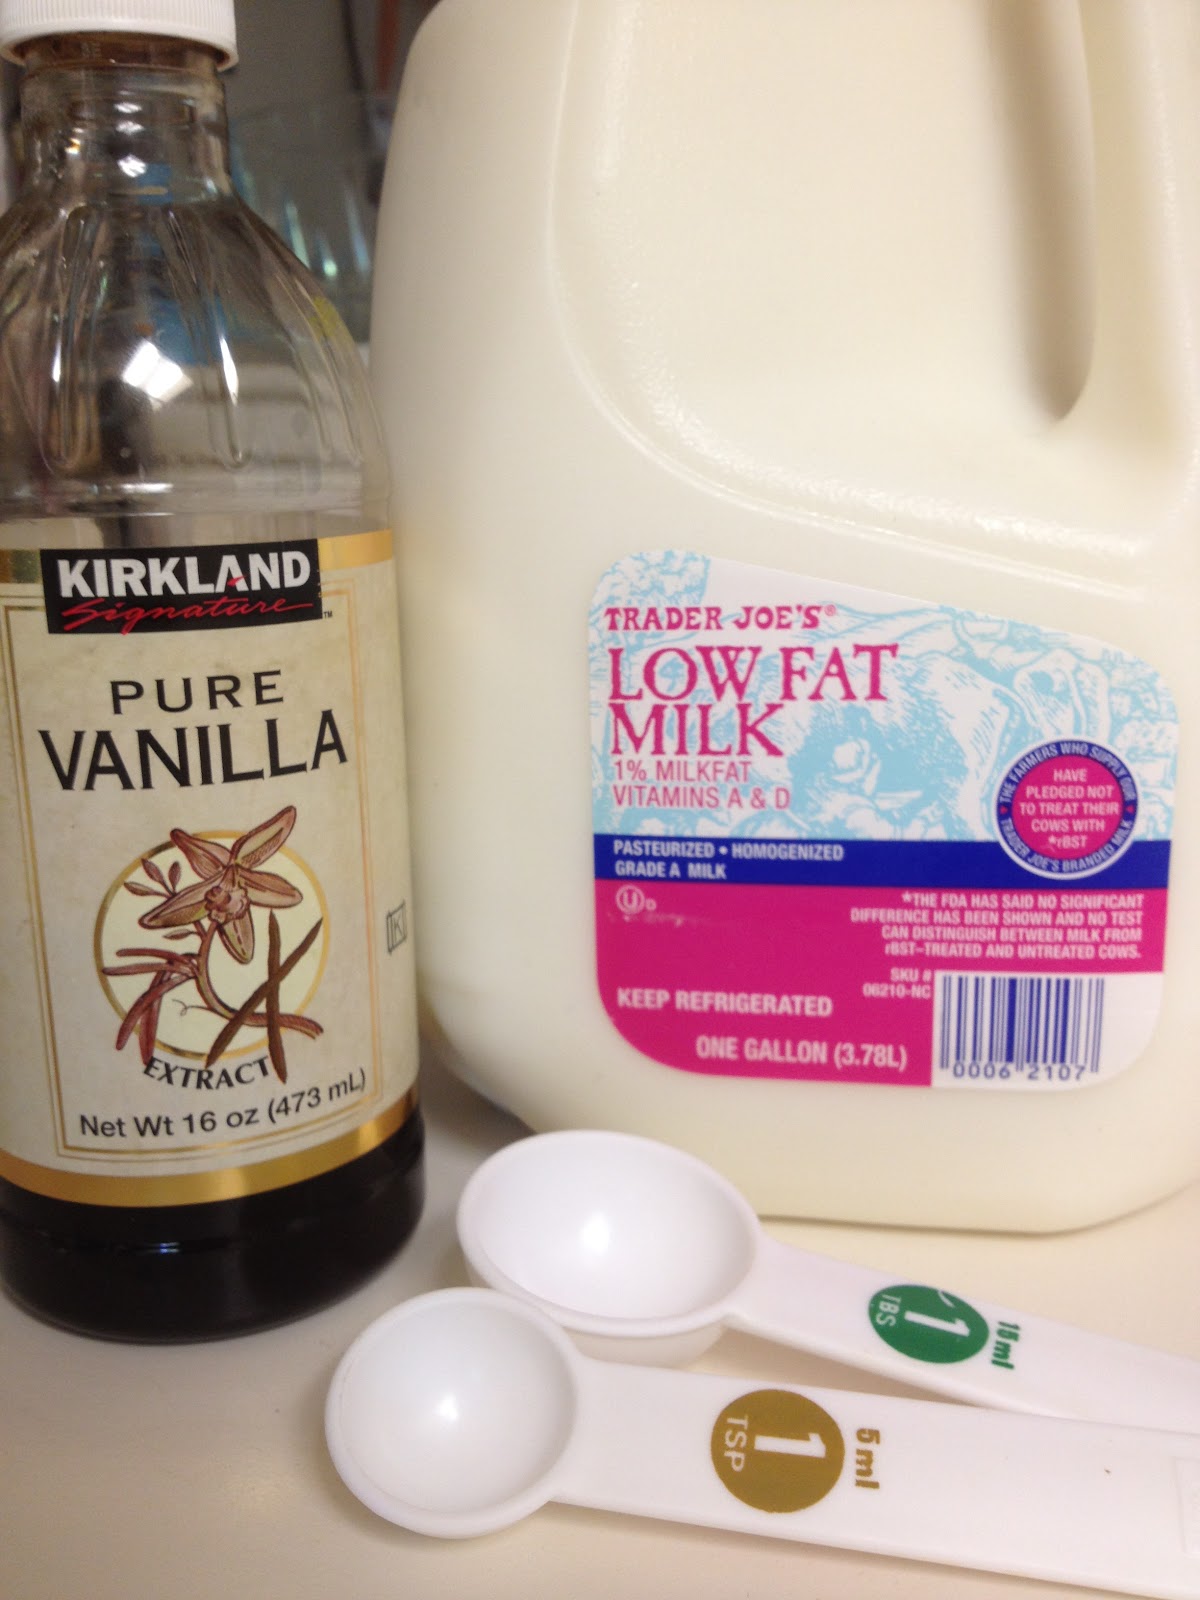
Add flour and baking soda. If you have the tools to sift flour, do it: Sifting will make the cake extra fluffy, but don't worry about it if you don't have the ability. I didn't sift my flour and it turned out just fine.
When the flour is all mixed in, go back to the bowl of egg whites and beat them until they're fluffy and form soft peaks, like this:
Please don't try and beat the egg whites by hand. It's really, really hard. Use an electric beater or mixer.
Once the egg whites are forming those lovely soft peaks, scoop about a quarter of the egg whites out and mix them into the batter. Then fold the rest of the egg whites in. Do this by stirring from the top of the bowl to the bottom instead of around the sides of the bowl. Do this gently so you don't flatten the egg whites.
Pour the cake batter into a springform pan and set it aside. Pull up a bowl of pitted cherries and add a few tablespoons of sugar (use 2 tablespoons if the cherries are sweet; 4 tablespoons if the cherries are a little bitter).
To be fair, pitting and sugaring the cherries is something that can be done ahead of time, but then you have the problem of roommates coming and eating all the cherries in the bowl while your hands are full with the batter. If you can set a guard about the fruit and know they'll be safe, then by all means prep ahead of time!
At any rate, when the batter is in the pan, pour the cherries on top of the batter as evenly as you can.
As the cake bakes, the batter will rise up around the cherries, and the cherries will sink down and be distributed throughout the cake. Or you can be impatient like I was and push on the cherries, and they'll all end up at the bottom. Either way, pop it in the over for an hour and once it's cooled, the cake is delicious!
Excuse me, I'm going to go get myself another slice. In the meantime, here's the recipe!
Torta di ciliege, from In Nonna's Kitchen by Carol Field
Ingredients
0.5 cups unsalted butter (one stick)
0.75 cups sugar
3 eggs, room temperature, separated
3 tablespoons milk
1 teaspoon vanilla extract
1 cup flour
1.5 teaspoons baking powder
Pinch of salt
1 pound meaty, dark ripe cherries, pitted
2 to 4 tablespoons sugar
To make
1. Preheat oven to 350 degrees; butter and flour a 9.5 inch springform pan.
2. Cream butter and sugar until light and fluffy.
3. Add egg yolks one at a time, beating thoroughly after each addition.
4. Stir in milk and vanilla.
5. Mix together the flour and baking powder, then sift into the bowl.
6. In a separate bowl, beat the egg whites with a pinch of salt until they form soft peaks.
7. Stir a quarter of the egg whites into the batter, then carefully fold in the rest.
8. Spread the batter into the springform pan. It will come halfway up the sides.
9. Combine the cherries and sugar, then spread them over the top.
10. Bake for 50 to 60 minutes, until the top is golden and a testing knife comes out clean.
11. Cool in the pan for 15 to 30 minutes, then unmold onto a rack to cool completely.
As a surprise addendum, the newspaper included nutritional information with the recipe! One cake has eight servings, and each serving has 381 calories, 6 grams of protein, 49 grams of carbohydrates, 18 grams of fat, and 159 milligrams of sodium. I hope you enjoy the cake anyway!
Showing posts with label recipes. Show all posts
Sunday, June 3, 2012
Wednesday, April 11, 2012
Redux: The most luxurious cake ever made
Before I start, I want to apologize to any regular readers out there (do you exist?). My life has been crazy lately, and I've been struggling to keep up with the blog. I do have a bunch of entries to type up... the words just aren't coming out! Expect a burst of new entries following this one, and I will try much harder to stay more regular. Thanks for your patience!
Now, on to the food.
Way back when I started this blog, I wrote about one of my favorite cakes: Guinness and chocolate cake. It was delicious, but I didn't do a step-by-step and didn't take very good pictures. So if you'll forgive me, today I'm going to fill you in on the details of this cake. (And yes, because I'm posting it twice, it means you really, really need to make it!)
Start off with a Guinness.
Now, on to the food.
Way back when I started this blog, I wrote about one of my favorite cakes: Guinness and chocolate cake. It was delicious, but I didn't do a step-by-step and didn't take very good pictures. So if you'll forgive me, today I'm going to fill you in on the details of this cake. (And yes, because I'm posting it twice, it means you really, really need to make it!)
Start off with a Guinness.
Pop it open and pour a fluid cup into a small pot over a medium-hot stove. Add a cup of butter (two sticks) and stir slowly until combined. Pour the rest of the Guinness into a glass and drink it.
At this point I'd like to reassure those who are not fans of beer that you can hardly taste the beer at all (and I'm one of those people who can taste the alcohol in anything, despite others saying you can't). You should, however, definitely add the beer because it gives the chocolate this deep, extra-rich flavor that you can't get in a normal cake. So add the beer.
Add cocoa powder and let it all mix together until the butter is melted and you want to drink the mix straight from the pan. Remove the pan from the heat and let it cool a little.
In a separate bowl, mix together sugar, flour, baking powder, and salt. As always, I split the sugars and did half a cup of granulated sugar and half a cup of brown sugar.
Set the dry ingredients aside, and in yet another bowl, mix eggs and sour cream. Beat them together until they're smooth.
We ran out of sour cream while I wasn't paying attention, so we used plain yogurt and that worked just fine. If you want to substitute, do so but use caution.
Pour the chocolate-butter-beer mix into the sour cream and eggs and beat it. Try not to lick the chocolate from the pot; it'll probably still be hot.
Slowly add the dry ingredients until everything is fully combined and looks like cake batter.
Add some chocolate chips. You know you want to.
Pour the batter into two floured 9-inch pans, or into a paper-lined cupcake tins. I can never do this evenly and it always works out, so don't try too hard.
Bake for about 30 minutes (if you're using cake pans). Check and see if the center has baked before you pull it out; if a toothpick or fork is inserted into the center and pulls out clean with no crumbs on it, then the cake is done and you should pull it out. Let the cakes cool on a wire pan. Try not to eat them.
Now for the Bailey's ganache. Sometimes I've been lazy and skipped this part, but every time I take the time to make it, I wonder why I ever thought I could go without it. So do it.
Heat heavy cream in a pot or in the microwave until it's simmering. Pour the cream over chocolate chips and let it sit for about 2 minutes. Seriously, don't touch it. This will ruin it.
When you can't take it any longer, stir the chocolate and cream. The cream will have melted the chocolate a little, and mixing will give it the extra friction to finish melting. At some point, throw a little butter in.
Pour in the Bailey's cream and continue to mix. If the chocolate hasn't melted all the way, stick it in the microwave in short 15 second bursts. When it's finished, the ganache should be shiny and smooth. Stir it occasionally as it cools so it cools evenly.
While the ganache and cake are cooling, whip up some frosting with butter, heavy cream, powdered sugar, a tiny bit of vanilla, and Bailey's cream. Because I was making this for St. Patrick's Day, I added food dye for funsies. (If you're a teetotaler, you can definitely skip the Bailey's in this... but it's just not as tasty!)
Once the cake had cooled, I poured the ganache on top of half the cake and smoothed it out, leaving a little bit of space around the edge so it wouldn't squirt over onto the side of the cake.
I put parchment paper around the edges to catch any frosting spills and crumbs. This is a good trick to having a clean and presentable plate without wiping your finger along the plate (which also works, but this is easy!)
I very gently eased the top half of the cake on top of the ganache and applied a "crumb coat" of frosting.
This catches all the annoying crumbs that get mixed up in your frosting. Applying a second coat of frosting makes the cake look smoother and the colors more vivid. The crumb crust doesn't have to be very thick — it's just there to smooth over the edges before the second coat goes on, much like a paint primer. After the second layer of frosting, I gently pulled the parchment paper out from under the cake and cleaned up any messes I had left around the plate.
I added orange sprinkles around the edges to make it Irish, and added "sláinte" (Gaelic for "health" or "cheers" or whatever you yell when drinking) and a shamrock for extra fun.
We don't have any more glamor shots of the cake because we ate it too quickly, but I can promise you that it's deeply rich, chocolatey, and amazing.
P.S. Remember how my roommate hates cake and sugar in general? Yeah, she loves this cake. A lot. She even texted me to say "that cake is one of the most beautiful things I've ever tasted."
Again, thanks to Annie's Eats for the recipe:
Guinness and chocolate cake with Bailey's buttercream frosting
Ingredients:
For the cake:
1 cup Guinness (or other) stout
1 cup unsalted butter
0.75 cups unsweetened cocoa powder
2 cups flour
2 cups sugar (1 cup brown sugar, 1 cup granulated)
1.5 teaspoons baking soda
0.75 teaspoons salt
2 large eggs
0.66 cups sour cream
1 cup bittersweet chocolate chips
For the ganache:
1 cup bittersweet chocolate, finely chopped
0.66 cups heavy cream
2 tablespoons room temperature butter
2 teaspoons Bailey's Irish cream (or more!)
For the frosting:
1 cup unsalted butter
5 cups powdered sugar
6 tablespoons Bailey's Irish cream
Splash of vanilla
To make:
For the cake:
1. Preheat oven to 350F.
2. Combine the stout and butter in a saucepan over a medium-hot stove and stir until melted.
3. Add the cocoa powder and whisk until combined. Set aside.
4. In a separate bowl, mix the flour, sugar, baking soda, and salt. Set aside.
5. In a large, separate bowl, beat the eggs and sour cream together until smooth.
6. Pour in the stout, butter, and cocoa mixture and mix it all together.
7. Slowly add the dry ingredients until combined.
8. Add chocolate chips, if adding them.
9. Pour into floured cake pans or papered cupcake tins and bake for 30 minutes (for cake pans) or 17 minutes (for cupcakes), or until a toothpick comes cleanly out of the center.
10. Let stand for 5 minutes, then tip out of the pan and allow to cool on a wire rack.
For the ganache:
1. Heat heavy cream in a pot or in the microwave until it's simmering.
2. Pour the cream over chocolate chips and let it sit for about 2 minutes.
3. Stir the chocolate and cream together to finish melting the chocolate.
4. Add butter and Bailey's. Stir until silky. If the chocolate has not completely melted, microwave it for very short bursts of time.
5. Set aside to cool. If you refrigerate it, stir it occasionally to ensure even cooling.
For the frosting:
1. Beat butter until smooth.
2. Add powdered sugar slowly, alternating with splashes of heavy cream, Bailey's, and vanilla until the frosting reaches the consistency and taste you want.
Sunday, April 1, 2012
The birthday cake that wasn't a cake
Folks, my roommate is a quirky one and I love her for it. She owns a shirt with cats and lasers on it. She watches Twin Peaks with me. Her biggest quirk is that she doesn't like cake — which for me, is akin to not enjoy air. So for the most part, she's immune to all the goodies I bribe the rest of my housemates with. When her birthday rolled around, I had to wrack my brain to come up with something sweet (but not too sweet!) to tempt her with. The solution? Zucchini bread, disguised as cake. I opened my Martha Stewart Baking Handbook and set to work grating zucchini.
A couple things for the record:
1. Those are giant zucchini (zucchinis? zucchinum?) and a normal bowl, not a tiny bowl and normal zucchini. This is important because...
2. Those two zucchini gave me two cups of grated zucchini. If you don't have monster-size zucchini, I would use three zucchini, just to make sure you have enough.
3. Grating zucchini is awkward. Do it alone.
I grated the zucchini first so I could make the cake batter all at once. Plus, it's always good to have everything ready beforehand. On that note, I also used a mini Cuisinart to chop walnuts... but I forgot to take a picture of that, so you'll have to take my word for it.
I mixed two kinds of sugars, eggs, and vegetable oil in a big bowl to start the batter.
With that combined, I added baking powder, baking soda, salt, cinnamon, and flour, along with an eensy sprinkling of nutmeg (because nutmeg can be delicious in small quantities).
After mixing these ingredients, I pretty much had the consistency of cake batter, but none of the deliciousness of zucchini bread, so then I added the zucchini and walnuts.
I floured two cake pans and split the batter between the them. I tried to get a housemate to do a quick taste test before I popped it in the oven, and she said she didn't want to put the batter anywhere near her mouth. She'd soon change her tune, though.
I popped the cakes in the oven and let them bake for an hour and 15 minutes. They weren't quite baked through, so I left them in until I could pull a toothpick out cleanly, then let them cool on a wire rack. (Take them out of the pans when you're able to touch the pans without hurting yourself.)
The whole house smelled like cinnamon wholehearted goodiness.
While I waited for the cake to cool, I mixed up some cream cheese frosting in my standing mixer: a cup of cream cheese, a cup of butter, a big splash of vanilla, a big splash of heavy whipping cream, and a few cups of powdered sugar. I can't tell you the exact amount because I basically beat the butter and cream cheese together then add powdered sugar, vanilla, and cream until it looks and tastes "right." I wanted stiffer frosting because it was going on the sides of the cake, so I went with more powdered sugar. Again, the recipe changes every time, but the basic ingredients remain the same.
I held some frosting in reserve and added black food dye to use it for decoration.
When the cake was finally cool, I put one layer on a plate and frosted the top to give the cake a frosting center.
Very, very carefully, I eased the second half of the cake on top of the frosting, trying to keep it from sliding around on top of the newly-frosted first layer.
Using a butter knife, I pushed the frosting over the edge to spread it as smoothly as possible around the sides, then filled in the top. Always start in the middle and go toward the edge when you're frosting.
When the frosting was as smooth as I thought I could make it, I took a toothpick and doodled out my design, inspired by Nedroid's Party Cat comic because a.) it's adorable b.) my roommate loves cats and c.) my roommate is always asking for a party. Boom. Done. (For moms out there: The comic is safe! Click away.)
Then I frosted over the design with the black frosting I made earlier, then used sprinkles to color in the cat's party hat. I even put little (hastily-drawn) cat paws all the way around the edge of the cake.
Et voilĂ ! When we brought the cake out, Roomie screamed so loud I nearly dropped the cake. When we finally got her to stop jumping up and down over how cute it turned out, and then finally persuaded her to slice into the cake and chop up its adorableness, the success continued and she declared the cake delicious. (I'm not even exaggerating here for story-telling purposes. She was really overexcited about a Party Cat cake.) So there you have it, folks. Got someone in your life who doesn't like sweet things? Feed them this cake and it might just change their minds.
P.S. Typing this up, I just realized I only put one set of whiskers on the cat. How sad! Maybe someone took off his whiskers off as a prank during a party?
Zucchini Cake or Bread
Ingredients:
2 cups grated zucchini (2 to 3 zucchini worth)
1 cup granulated sugar
1 cup packed brown sugar
1 cup vegetable oil
3 large eggs
3 cups flour
1 teaspoon salt
1.5 teaspoons baking powder
1.5 teaspoons baking soda
1 tablespoon cinnamon
1 cup chopped walnuts
To make:
1. Preheat oven to 350F, wash and grate zucchini, and chop walnuts. Set aside.
2. Mix both sugars, vegetable oil, and eggs in a large bowl.
3. Add flour, salt, baking powder, baking soda, and cinnamon and mix until thoroughly combined.
4. Add grated zucchini and chopped nuts. Stir.
5. Pour into floured or greased pans (either cake pans or bread loaf pans) and bake for about an hour and 15 minutes, or until a toothpick comes out clean after poking the cake.
6. Cool on a wire rack.
For the cake:
7. Mix together cream cheese frosting (1 cup cream cheese, 1 cup butter, 1 tablespoon vanilla 1 to 3 tablespoons heavy whipping cream, and about 4 cups powdered sugar).
8. Frost cake and decorate.
A couple things for the record:
1. Those are giant zucchini (zucchinis? zucchinum?) and a normal bowl, not a tiny bowl and normal zucchini. This is important because...
2. Those two zucchini gave me two cups of grated zucchini. If you don't have monster-size zucchini, I would use three zucchini, just to make sure you have enough.
3. Grating zucchini is awkward. Do it alone.
I grated the zucchini first so I could make the cake batter all at once. Plus, it's always good to have everything ready beforehand. On that note, I also used a mini Cuisinart to chop walnuts... but I forgot to take a picture of that, so you'll have to take my word for it.
I mixed two kinds of sugars, eggs, and vegetable oil in a big bowl to start the batter.
With that combined, I added baking powder, baking soda, salt, cinnamon, and flour, along with an eensy sprinkling of nutmeg (because nutmeg can be delicious in small quantities).
| Blurry pictures are the best, right guys? Right? |
| This isn't a cake, it's practically a salad. |
I popped the cakes in the oven and let them bake for an hour and 15 minutes. They weren't quite baked through, so I left them in until I could pull a toothpick out cleanly, then let them cool on a wire rack. (Take them out of the pans when you're able to touch the pans without hurting yourself.)
| Hello, gorgeous. |
While I waited for the cake to cool, I mixed up some cream cheese frosting in my standing mixer: a cup of cream cheese, a cup of butter, a big splash of vanilla, a big splash of heavy whipping cream, and a few cups of powdered sugar. I can't tell you the exact amount because I basically beat the butter and cream cheese together then add powdered sugar, vanilla, and cream until it looks and tastes "right." I wanted stiffer frosting because it was going on the sides of the cake, so I went with more powdered sugar. Again, the recipe changes every time, but the basic ingredients remain the same.
I held some frosting in reserve and added black food dye to use it for decoration.
When the cake was finally cool, I put one layer on a plate and frosted the top to give the cake a frosting center.
Very, very carefully, I eased the second half of the cake on top of the frosting, trying to keep it from sliding around on top of the newly-frosted first layer.
Using a butter knife, I pushed the frosting over the edge to spread it as smoothly as possible around the sides, then filled in the top. Always start in the middle and go toward the edge when you're frosting.
When the frosting was as smooth as I thought I could make it, I took a toothpick and doodled out my design, inspired by Nedroid's Party Cat comic because a.) it's adorable b.) my roommate loves cats and c.) my roommate is always asking for a party. Boom. Done. (For moms out there: The comic is safe! Click away.)
Then I frosted over the design with the black frosting I made earlier, then used sprinkles to color in the cat's party hat. I even put little (hastily-drawn) cat paws all the way around the edge of the cake.
Et voilĂ ! When we brought the cake out, Roomie screamed so loud I nearly dropped the cake. When we finally got her to stop jumping up and down over how cute it turned out, and then finally persuaded her to slice into the cake and chop up its adorableness, the success continued and she declared the cake delicious. (I'm not even exaggerating here for story-telling purposes. She was really overexcited about a Party Cat cake.) So there you have it, folks. Got someone in your life who doesn't like sweet things? Feed them this cake and it might just change their minds.
| Also, Party Cat cake will be in your life. |
Zucchini Cake or Bread
Ingredients:
2 cups grated zucchini (2 to 3 zucchini worth)
1 cup granulated sugar
1 cup packed brown sugar
1 cup vegetable oil
3 large eggs
3 cups flour
1 teaspoon salt
1.5 teaspoons baking powder
1.5 teaspoons baking soda
1 tablespoon cinnamon
1 cup chopped walnuts
To make:
1. Preheat oven to 350F, wash and grate zucchini, and chop walnuts. Set aside.
2. Mix both sugars, vegetable oil, and eggs in a large bowl.
3. Add flour, salt, baking powder, baking soda, and cinnamon and mix until thoroughly combined.
4. Add grated zucchini and chopped nuts. Stir.
5. Pour into floured or greased pans (either cake pans or bread loaf pans) and bake for about an hour and 15 minutes, or until a toothpick comes out clean after poking the cake.
6. Cool on a wire rack.
For the cake:
7. Mix together cream cheese frosting (1 cup cream cheese, 1 cup butter, 1 tablespoon vanilla 1 to 3 tablespoons heavy whipping cream, and about 4 cups powdered sugar).
8. Frost cake and decorate.
Friday, March 23, 2012
Things to be thankful for
(Don't worry, this will get to food... eventually.)
One of the things I've been trying very hard to do during finals is be thankful for what I have. Finals and work stress really, really get to me in the worst way, so I've been trying to remind myself of the good things to help calm me down. I first thought of this when I was drawing a thank you card for some relatives that helped me out with spring break plans (and also to procrastinate on studying for finals, but mostly because I was grateful).
| The secret to drawing awesome cards? Draw in pencil first, then ink it in with a gel/ballpoint pen. When the ink is dry, erase pencil marks and fill in empty spaces. |
I'm incredibly lucky to be employed as I work my way through college, and even luckier to be employed somewhere that values creativity. (No, seriously: Check out this pitch my boss wrote!) Sometimes the commute can get me down, but then I'm treated to the most amazing skies and the drive doesn't seem bad at all. I mean, just take a look:
And of course, I'm thankful for my readers! You guys are awesome...
I'm also thankful my mom taught me to make French toast, and I'm deeply thankful for this French toast, because it's freaking delicious. I use Semifreddi's cinnamon challah swirl as the base, but it's tasty with any kind of bread. Plain challah, Italian bread like pugliese or ciabatta, French bread, sourdough sandwich bread, cinnamon raisin bread — all kinds of bread are delicious. (I'm hungry, okay? Lists of food are forthcoming.)
First thing is to slice your bread. Thick slices are delicious but will need to be cooked for longer; thinner slices will cook more quickly.
I usually cook the whole loaf and eat the rest for breakfast later in the week. For each two slices of bread, you'll need one egg and a quarter cup of milk, so with 10 slices of bread, I mixed five eggs and a cup and a quarter of milk.
Beat the eggs and milk together as much as you can. If you don't have flavored bread, at this point you can add cinnamon and a little vanilla to the eggs (and nutmeg, if you like it!) to get sweeter French toast, or add dried basil and oregano for a savory version.
Pour a little egg and milk over the bread and let it soak in.
The thicker your bread and slices are, the longer it will take to soak in. My mom actually leaves bread to soak in eggs and milk overnight in the fridge in a 9 by 13 inch pan if she's using pugliese or baguettes. Challah absorbs liquid easily, so it doesn't need to soak too long.
Plop the bread on a medium-high skillet and let it cook. The key here is patience, patience, PATIENCE! When you're cooking French toast, you're essentially cooking an egg inside a slice of bread. Do not sear the outside and let the inside of the bread remain soggy.
Flip when one side is golden brown and looks like a cooked egg. Depending on your skillet heat, this will take about four minutes, but don't worry if it takes longer! If the outside is cooking but the inside is staying soggy, cover your skillet with tin foil (shiny side facing the French toast) to help it cook. When both sides are cooked, serve with real maple syrup and fresh fruit, your favorite jam or honey, or you've made savory French toast, serve with sausage and lemon green beans.
Refrigerate any leftovers to enjoy later! Reheat and spread with peanut butter and jam. Make this French toast for the people in your life you're grateful for, and be thankful for all the delicious varieties of French toast you can make. I certainly am!
French toast
Ingredients:
Bread
Eggs (1 egg per two slices of bread)
Milk (0.25 cups per two slices of bread)
To make:
1. Whisk together milk and eggs.
2. Soak bread in egg/milk mixture.
3. Cook soaked bread on a medium-hot skillet. If the center isn't cooked through, cover the skillet with tin foil.
4. When both sides are cooked, serve with syrup, jam, or fresh fruit.
Thursday, March 22, 2012
Citrus salt scrub
Waaaaay back in December, my roommate and I made this wonderful face and body scrub for our housemates' Christmas presents. It's quite simple to make, smells delicious, and feels wonderful on your face.
(And apparently, I'm on a citrus kick for the blog!)
Since we were making this scrub as a present, we mixed it up in our bathroom to keep it a surprise. (We felt a little like we were cooking drugs, so I made this logo as a play on AMC's "Breaking Bad.")
We started out by zesting a lemon and an orange — except we didn't have a zester at the time, so we peeled the fruit and diced the peel into the smallest pieces we could manage.
We put the zest in a bowl, then added the coarsest salt we could find without going as coarse as rock salt.
Then we added light olive oil...
We used light olive oil for two reasons: 1. We couldn't find a lot of almond oil for a reasonable price and 2. normal olive oil is more likely to cling to your skin and cause acne. On this note, remember that light olive oil is different from extra virgin olive oil!
We mixed everything together (though it did separate quickly), and poured it into a jar for each of our housemates.
I made up a little label for them, we wrapped them, and gave them away. Afterwards we realized that it wasn't exactly tactful to give the people we live with soap... but this smells so darn good that none of our housemates minded!
Citrus salt scrub
Ingredients:
0.5 cup light olive oil, or almond oil
0.5 cup coarse sea salt
1 teaspoon lemon zest
1 teaspoon orange zest
To make:
Mix ingredients. Store in an air-tight container.
(And apparently, I'm on a citrus kick for the blog!)
Since we were making this scrub as a present, we mixed it up in our bathroom to keep it a surprise. (We felt a little like we were cooking drugs, so I made this logo as a play on AMC's "Breaking Bad.")
We started out by zesting a lemon and an orange — except we didn't have a zester at the time, so we peeled the fruit and diced the peel into the smallest pieces we could manage.
![]() |
| Fear not: Cold medicine and hair gel are not part of this recipe. |
Then we added light olive oil...
We used light olive oil for two reasons: 1. We couldn't find a lot of almond oil for a reasonable price and 2. normal olive oil is more likely to cling to your skin and cause acne. On this note, remember that light olive oil is different from extra virgin olive oil!
We mixed everything together (though it did separate quickly), and poured it into a jar for each of our housemates.
I made up a little label for them, we wrapped them, and gave them away. Afterwards we realized that it wasn't exactly tactful to give the people we live with soap... but this smells so darn good that none of our housemates minded!
Citrus salt scrub
Ingredients:
0.5 cup light olive oil, or almond oil
0.5 cup coarse sea salt
1 teaspoon lemon zest
1 teaspoon orange zest
To make:
Mix ingredients. Store in an air-tight container.
Sunday, March 18, 2012
Mini lemon souffles: Summer in the middle of winter
My friend and I made deliciously tart lemon souffles, I took a bunch of pictures, and I'll share the recipe with you, but first I have to tell you this story: I've been tracking my social media with Klout, a tool that looks at your influence the world of Twitter, Facebook, Google+, blogs, etc. (Speaking of which, don't forget to follow me on Twitter!) It also measures how much influence you have over a particular topic. According to Klout, I'm influential over the topic of Minnesota.
Guys. I've never even mentioned Minnesota. I love when tools like this turn up such wacky results! For what it's worth, the blog tool tracks what search keys people used to find your blog. The top results are for "scherenschnitte," which makes sense, and "you pull it out," which I don't understand at all. I love search engine analytics!
Anyway. Enough about nerd stuff, let's get on to the baking!
I found this recipe for mini lemon souffles baked in lemon rinds on Martha Stewart's website and wanted them immediately. The recipe was first published in 1998, when I was in elementary school and couldn't separate an egg. Twelve years later, the recipe has held up brilliantly. My friend has a lemon tree (and therefore more lemons than she knows what to do with), so she brought some over and we pretended we were fancy with our souffles.
The original recipe asks for you to remove the inside of the lemons with a grapefruit spoon or a melon baller. Sadly, we didn't have either of these things, so we used spoons to scrape the lemon pulp.
We couldn't punch through the bottom layer of the lemon. The bottom of the lemon is sliced off to let it sit stably on the cookie sheet, but we were afraid that without the skin to hold the souffle batter in, it would spread all over the cookie sheet, so we placed the hollowed-out lemons in a muffin tin.
The first start of the actual souffle part is to whisk lemon juice, egg yolks, sugar, and flour.
We whisked this together, then held it over a pot of simmering water to thicken it. We stirred constantly, then pulled it off the heat and continued to stir until it was cooler. (In the background of the picture below, we've got homemade pizza. Yum!)
Guys. I've never even mentioned Minnesota. I love when tools like this turn up such wacky results! For what it's worth, the blog tool tracks what search keys people used to find your blog. The top results are for "scherenschnitte," which makes sense, and "you pull it out," which I don't understand at all. I love search engine analytics!
Anyway. Enough about nerd stuff, let's get on to the baking!
I found this recipe for mini lemon souffles baked in lemon rinds on Martha Stewart's website and wanted them immediately. The recipe was first published in 1998, when I was in elementary school and couldn't separate an egg. Twelve years later, the recipe has held up brilliantly. My friend has a lemon tree (and therefore more lemons than she knows what to do with), so she brought some over and we pretended we were fancy with our souffles.
The original recipe asks for you to remove the inside of the lemons with a grapefruit spoon or a melon baller. Sadly, we didn't have either of these things, so we used spoons to scrape the lemon pulp.
We couldn't punch through the bottom layer of the lemon. The bottom of the lemon is sliced off to let it sit stably on the cookie sheet, but we were afraid that without the skin to hold the souffle batter in, it would spread all over the cookie sheet, so we placed the hollowed-out lemons in a muffin tin.
The first start of the actual souffle part is to whisk lemon juice, egg yolks, sugar, and flour.
We whisked this together, then held it over a pot of simmering water to thicken it. We stirred constantly, then pulled it off the heat and continued to stir until it was cooler. (In the background of the picture below, we've got homemade pizza. Yum!)
We set this mixture aside, then used the same technique and heated egg whites and sugar until the sugar melted, then we used an electric mixer to beat the mix until we could pull the egg whites up and soft peaks would remain after.
| I tried using a hand whisk at first. Please, do not make the same mistake I did. Go straight to the electric mixer! |
We mixed about a third of the egg whites in with the egg yolks, using a whisk to stir them until they were combined.
When these were combined, we slowly folded the rest of the egg whites in with the egg yolk mix. The secret here is to go slowly: You don't want to crush the egg whites (they're what make the souffle so poofy), so you need to make a circle with a spatula around the bowl, cutting the two together without crushing the egg whites.
We alternately spooned the mix into the hollowed-out lemons and cleaned the bowl out with our fingers, then licked our fingers clean. We had smaller lemons than the recipe called for, so the souffle spiled over the edge of the lemon rind, which was fine.
| This picture is so very washed out. Awesome. |
Side note: We filled the empty cups with water so the lemons wouldn't cook unevenly. This is important to do whenever there are empty cups in whatever you're baking in a muffin tin.
When the souffle tops were ever-so-slightly browned, we pulled the souffles out. The souffle puffed up quite a bit and spilled over the rind.
We pulled them out with tongs, placed them on plates, sprinkled them with powdered sugar, and tried to savor them — but we devoured them instead.
The souffle itself is light and fluffy, and gets scrumptiously tart when you spoon it out from the rind. I love these little babies — they're definitely going on the menu for summer, and they were a great reminder of sunshine in the middle of a winter rainstorm. You're going to love them.
Mini lemon souffles
Ingredients:
8 large lemons
3 eggs, separated
0.5 cups sugar
2 tablespoons flour
Powdered sugar, for topping
To make:
1. Preheat oven to 350F.
2. Trim "bottom" end from lemons so they sit flat on their own. Cut the "top" or stem end about a third of the way down.
3. Scoop out the pulp and squeeze the juice out. Put the shells in a muffin tin or on a baking sheet lined with parchment paper.
4. Mix the egg yolks, 0.25 cups of granulated sugar, 0.25 cups of the lemon juice you squeezed earlier, and the flour in a heat-proof bowl. Whisk until the mixture is pale yellow.
5. Hold the bowl over simmering water, whisking constantly for about 8 minutes. When it's thickened, remove the bowl and continue to mix until it cools. Set aside.
6. Mix egg whites and remaining 0.25 cups of sugar in another bowl, and hold it over the simmering water until the sugar has melted.
7. Beat egg whites with an electric mixer, first on a low speed until they're frothy, then on increasingly higher speed until the meringue is shiny and pulling the beater out leaves soft peaks. Don't overbeat!
8. Whisk about a third of the meringue/egg whites into the egg yolks and lemon.
9. Fold the rest of the egg whites into the yolk mixture very gently.
10. Spoon the souffle into the hollowed out lemon rinds, and bake the souffles for about 14 minutes.
11. Transfer souffles onto plates, sprinkle with confectioners' sugar, and serve immediately.
Subscribe to:
Posts (Atom)


