Showing posts with label cooking. Show all posts

Thursday, April 19, 2012

Lazy food

My dear friend Katie is a go-getter. She has a more-than-full-time job, is finishing up her master's degree, and still finds time to exercise. Over at her fabulous blog she's keeping track of how many miles she runs and all the healthy food she's making to help her stay in shape. She's even persuaded me to do a 5K run in August called The Color Run. I only agreed to it because it's actually a "run/walk," it's short (she's persuaded others to do marathons with her. Ha!), and because as we run, we're basically going to get tie-dyed. Awesome.

Even though I ought to be training for this run, spring has hit California strongly, and all I'm inspired to do is curl up and take naps in the sun like a cat. When it comes time for dinner, I'm lacking the inspiration necessary to take on big dishes that require a lot of cleaning afterward. So I introduce to you one of my favorite lazy meals: The sort-of burrito.


Melt cheese between two corn tortillas, slather some refried beans on top, add salsa, sour cream, and any other toppings you enjoy. (Olives and chopped lettuce are great, but I haven't been grocery-shopping in a while. Like I said, I've been lazy!) Fold it in half and nom away.

I'm not entirely sure who my audience is here, and if you're reading this thinking, "I'm a real adult and I need real meals!" then I say to you: Enjoy this as a snack or lunch instead of dinner.

To those of you reading this thinking, "Oh man. I'm hungry but don't have tortillas or cheese or anything except cereal" I say: Rock on. College is fun.

I enjoyed this particular meal with a glass of Two Buck Chuck because, well... college is fun.

(Longer blog post coming this weekend.)

Friday, March 23, 2012

Things to be thankful for

Yesterday I turned in my last final of the term and I'm officially on spring break for one short, glorious week and a half. Well, I still have to go to work today, but as far as school is concerned, I'm on spring break! It's a little bittersweet, because this is my last spring break ever, but I have big plans to make it memorable. Surprisingly, these plans aren't "sit on my bum and watch Star Trek all day."

(Don't worry, this will get to food... eventually.)

One of the things I've been trying very hard to do during finals is be thankful for what I have. Finals and work stress really, really get to me in the worst way, so I've been trying to remind myself of the good things to help calm me down. I first thought of this when I was drawing a thank you card for some relatives that helped me out with spring break plans (and also to procrastinate on studying for finals, but mostly because I was grateful).

The secret to drawing awesome cards? Draw in pencil first, then ink it in with a gel/ballpoint pen.
When the ink is dry, erase pencil marks and fill in empty spaces.
 I am grateful that I have finals in the first place — I know so many people who can't afford college or are indebting themselves because they value a diploma so much. In this economy, in this world, I'm incredibly lucky just to be in school, be reading, and be taking classes I enjoy — even if they stress me out.

I'm incredibly lucky to be employed as I work my way through college, and even luckier to be employed somewhere that values creativity. (No, seriously: Check out this pitch my boss wrote!) Sometimes the commute can get me down, but then I'm treated to the most amazing skies and the drive doesn't seem bad at all. I mean, just take a look:


And of course, I'm thankful for my readers! You guys are awesome... even especially if you're my friend and I'm forcing you to read it!

I'm also thankful my mom taught me to make French toast, and I'm deeply thankful for this French toast, because it's freaking delicious. I use Semifreddi's cinnamon challah swirl as the base, but it's tasty with any kind of bread. Plain challah, Italian bread like pugliese or ciabatta, French bread, sourdough sandwich bread, cinnamon raisin bread — all kinds of bread are delicious. (I'm hungry, okay? Lists of food are forthcoming.)

First thing is to slice your bread. Thick slices are delicious but will need to be cooked for longer; thinner slices will cook more quickly.


I usually cook the whole loaf and eat the rest for breakfast later in the week. For each two slices of bread, you'll need one egg and a quarter cup of milk, so with 10 slices of bread, I mixed five eggs and a cup and a quarter of milk.


Beat the eggs and milk together as much as you can. If you don't have flavored bread, at this point you can add cinnamon and a little vanilla to the eggs (and nutmeg, if you like it!) to get sweeter French toast, or add dried basil and oregano for a savory version.

Pour a little egg and milk over the bread and let it soak in.


The thicker your bread and slices are, the longer it will take to soak in. My mom actually leaves bread to soak in eggs and milk overnight in the fridge in a 9 by 13 inch pan if she's using pugliese or baguettes. Challah absorbs liquid easily, so it doesn't need to soak too long.


Plop the bread on a medium-high skillet and let it cook. The key here is patience, patience, PATIENCE! When you're cooking French toast, you're essentially cooking an egg inside a slice of bread. Do not sear the outside and let the inside of the bread remain soggy.


Flip when one side is golden brown and looks like a cooked egg. Depending on your skillet heat, this will take about four minutes, but don't worry if it takes longer! If the outside is cooking but the inside is staying soggy, cover your skillet with tin foil (shiny side facing the French toast) to help it cook. When both sides are cooked, serve with real maple syrup and fresh fruit, your favorite jam or honey, or  you've made savory French toast, serve with sausage and lemon green beans.


Refrigerate any leftovers to enjoy later! Reheat and spread with peanut butter and jam. Make this French toast for the people in your life you're grateful for, and be thankful for all the delicious varieties of French toast you can make. I certainly am!

French toast
Ingredients:
Bread
Eggs (1 egg per two slices of bread)
Milk (0.25 cups per two slices of bread)

To make:
1. Whisk together milk and eggs.
2. Soak bread in egg/milk mixture.
3. Cook soaked bread on a medium-hot skillet. If the center isn't cooked through, cover the skillet with tin foil.
4. When both sides are cooked, serve with syrup, jam, or fresh fruit.

Thursday, March 15, 2012

Homemade, homestyle pizza

I had a craving for pizza for a while, but since I'd been in quarantine for a while, the idea of ordering pizza simply wasn't doing it for me. I needed to get into the kitchen, get flour all over my clothes and counters, and make pizza the way my mom has made it for years: from scratch. My friend came over, we opened a bottle of wine, and got to work proving stereotypes about college diets aren't always true.

This method has two steps, so if you're going to go all the way, you need to block out plenty of time to prep everything, or else you'll end up eating at 9 o'clock at night and you won't have time to enjoy your creation. If you're going to put the effort in, make sure you have time to savor it!

First step is to make the pizza dough and let it rise. Start this at least two hours before you want to roll the dough out and bake the pizza in the oven. I'm using Patricia Wells' Trattoria pizza/bread dough recipe. It's always worked well for my family, so it's what I rely on. (Also, it makes enough dough for two pizzas, so I'm guaranteed to have my craving fulfilled!)

Start out by whisking sugar, lukewarm water, and yeast together, then let it sit for about five minutes and get foamy and bubbly.

I know I always write about this, but make sure the water is warm, but not too hot. Find the Goldilocks temperature by holding the measuring cup against your wrist: It should feel warmer than your skin, but comfortable. If it hurts, the water is too hot and will kill the yeast. (Also, you can use a candy thermometer to get the water to around 115F. I've definitely done this before.)

When the yeast is bubbling and smells bad, add the salt and olive oil to make lava lamp patterns.


At this point I put the dough hook on my mixer and started adding flour a half cup at a time. (I used whole wheat flour for a third of the flour to give the dough a bit of texture.) Make sure you scrape down the sides and the bottom with a spatula so all the flour is mixed in.

When the dough is no longer sticking to the sides of the bowl and forms a ball (about 3 to 3.5 cups of flour later), pull it out of the bowl and knead it for about 5 minutes on a floured surface until it's smooth and doesn't stick to your hands too much.


Roll the dough into a ball, plop it in a bowl, cover it with plastic wrap or a towel, and let it rise. If you're in a rush, place it somewhere warm — I like putting it in the laundry closet if someone's running the dryer. At home, my mom would put the dough in the oven, but this only works if you have a gas oven that holds heat. It doesn't work in electric ovens, and you might kill the yeast.


When the dough has doubled in size, it's ready. This usually takes about two hours, but if it's very cold in your kitchen, it can take longer. (As a side note, if you want to make pizza the next day, let the dough rise in the refrigerator and it will take about a day to rise.)

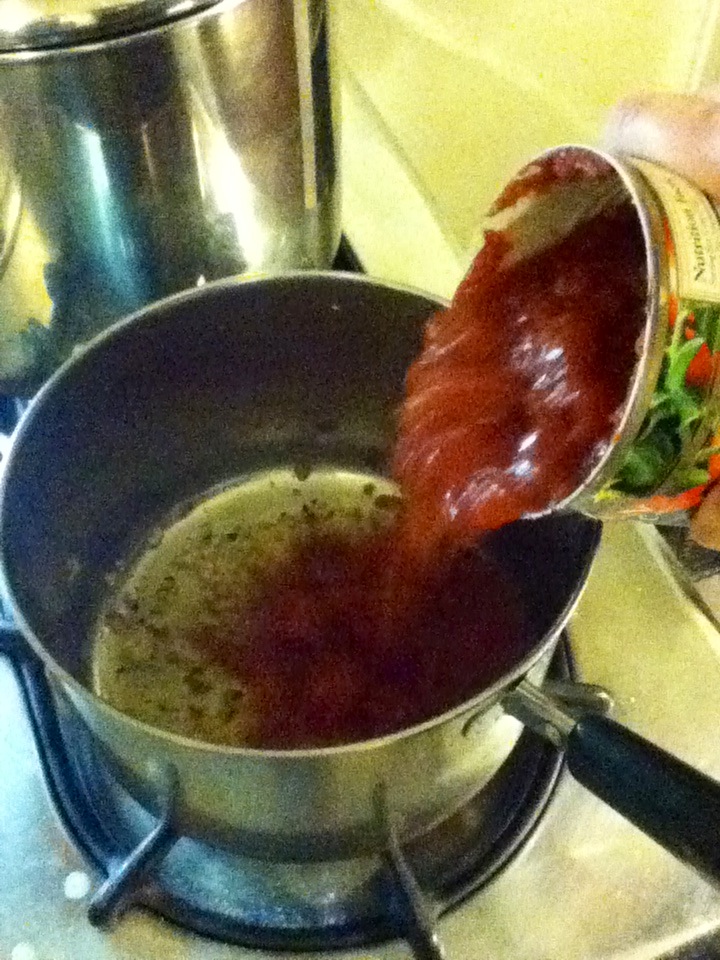
While my dough was rising, I started making the tomato sauce. Cans of diced tomatoes in olive oil and garlic had been lurking in my pantry for far too long, so I took those and dumped them in a pot and simmered to reduce it to the consistency of sauce.
If I had plain diced tomatoes, I probably would have browned some garlic in olive oil first, then added the tomatoes, along with whatever seasonings I was digging at the moment. And next time I make sauce from scratch, I'm going to put the tomatoes through a food processor first: The sauce was very chunky and would have been better chopped up a bit.

The sauce simmered for about a half an hour on very low heat (we could've cranked it up if we were in a  hurry), and when it was looking much thicker we rolled out our first pizza. Here's the awesome part about making your own pizza: You can choose how thick you want the crust. Some people like a thin, cracker-like crust, some people like a thick crust. All you have to do is roll the dough out more or less. A warning: thicker crust means a smaller pizza overall. And if you want a very thin crust, be careful not to overload the pizza with toppings or make the pizza bigger than your cookie sheet!

Much better.
Our first pizza was a bit of a test run, so we just put sauce and mozzarella on top. We cooked it on a cookie sheet lined with parchment paper and it turned out great.

Encouraged by our results, we got a bit bolder with our second pizza, adding roughly chopped basil under the cheese and asiago to the mozzarella.

This also made the kitchen smell like basil. Now, some people will put entire leaves of basil on top of their pizzas, and that's fine, but if you chop up the basil, it releases some oils and the basil scent lingers. That's what I'm talkin' about, baby.


We baked the pizzas one at a time, but they can be done together. We only staggered them so we could gnaw on one while waiting for the second (I'm a terribly impatient person).

This is the only artsy shot I took.
Like I said, I'm impatient! Especially where pizza is concerned.
And there you have it! We went the simple route, but the beauty of making your own pizza is you can also add your own toppings. My mom loves putting sliced red onion on, my dad and brother love spicy pepperoni, my friend likes artichokes or roasted red bell pepper, and I even know some people who don't like sauce, so they eat their pizza with just cheese and toppings.

I definitely recommend the basil and asiago combo: Together they add a bit of a bite and some tanginess to the sweetness of the mozzarella. But you certainly don't have to take my word for it! Here's the recipe so you can experiment with your own toppings. Enjoy!

Pizza dough
Ingredients:
1 teaspoon dry yeast
1 teaspoon sugar
1.5 cups lukewarm water
2 tablespoons extra virgin olive oil
1 teaspoon salt
about 3.75 cups flour

To make:
1. In a large bowl, combine yeast, sugar, and water. Stir to blend and let it sit until foamy (about five minutes).
2. Stir in oil and salt.
3. Add the flour a little at a time, stirring until most of the flour has been absorbed and the dough forms a ball.
4. Transfer the dough to a floured surface and knead until soft and satiny but still firm. This will take about 5 minutes of kneading. Add extra flour to keep the dough from sticking to the surface or your hands.
5. Transfer the dough to a bowl, cover tightly with plastic wrap, and let it rise until it doubles in size.
6. Preheat oven to 500F.
7. Split dough in half, and roll it out into a circle. Put the dough on a cookie sheet.
8. Add sauce and toppings, but don't get too close to the edge or the toppings will spill over while baking.
9. Bake until dough is crisp and golden; 10 to 15 minutes.
10. Take pizza out of the oven, transfer to cutting board, slice, serve, and enjoy.

Sunday, January 22, 2012

Veggie chili night

rLast weekend my friends and I met up at the Davis Farmers' Market (which I've raved about before) to shop, talk, and eat freshly-baked naan. I had just downloaded the Instagram app, so we took a few hipster pics, bought some carrots, and one of us learned to slackline:

It was a clear day, but very, very windy. Eventually the cold drove us inside and I decided it was the perfect weather for chili, so I invited my friend Jessica over and we got to work.

I got this chili recipe from my mom, which means that it's vegetarian, but even my meat-loving boyfriend devours it and asks for seconds. The best part about this recipe is that it's incredibly flexible — I've left out a few ingredients with no sacrifice in taste, but you can also add in whatever you like (and you can probably even add ground beef or what have you). It's also quite simple -- my best friend even made it in Germany the other day -- but it does take at least an hour and a half to cook, so plan ahead.

First up? Sauté a diced onion in olive oil until it begins to soften, then add garlic and cook it a bit longer. Stir frequently and don't burn it.
Earlier in the day I baked 160 cookies. Never. Again.
We chopped up some carrots, a red bell pepper, and a zucchini and threw them in and let them cook again. We added our spices (plus a little bit of cayenne pepper to give it some kick) and some rice and let it cook just a little bit.
I love all the colors!
Then we added water in because I didn't have any broth, and then we dumped in a can of diced tomatoes. We brought all this to a boil...

... and let it simmer for 40 minutes or so while we watched Top Gear (British men blowing things up and driving fast in sexy cars? Yes please).

After simmering the chili was much thicker and the rice was cooked. We added beans and corn and let it cook for another 10 minutes. I feel like at this point I should note that some people are of the belief that chili isn't chili if it has beans in it. To those people I say: Enjoy this delicious vegetable stew!
We devoured massive bowls of this topped with cheddar and jack cheese with a side of freshly-made buttermilk cornbread. I've also had it with sour cream on top, guacamole (and sliced avocado), salsa — the options are limitless.
Dee-licious.
Chili just sort of cuddles up in your stomach. It's the perfect cold-weather recipe! Oh, and one of my favorite parts about chili night? (Other than eating chili, of course.) Cornbread slathered with butter and maple syrup the next day for breakfast:
I made this a week ago and now that I've typed up this blog entry, I'm definitely craving it again! A week between chili nights isn't too short a time ... right?

Enjoy!

Vegetarian Chili
Ingredients:
The ingredients in this chili are incredibly flexible. Add whatever you have in your kitchen.
1 yellow onion, chopped
2 to three tablespoons olive oil
1 stalk celery, chopped
1 large carrot, chopped
1 zucchini, chopped
1 red bell pepper, chopped
3 cloves of garlic
0.5 teaspoon oregano
0.5 teaspoon cumin
2 teaspoon chili powder (or to taste)
0.5 cup rice
2 cups of vegetable broth or water (with rice — 0.5 cups without)
15 ounces diced tomatoes (one can)
30 ounces of beans (two cans — I prefer black beans, but any kind is okay)
1 cup frozen corn
Veggie taco filling
Dollop of tomato paste

To make:
1. Let the onion sauté for a bit in the olive oil on medium/medium-low.
2. Add the celery, carrots, and garlic. Stir occasionally so the bottom doesn't burn. Let sauté for a minute or two.
3. Add the zucchini and bell pepper.
4. Add spices.
5. Add rice, if you're adding it.
6. Add vegetable broth, bullion cubes, or water. Add more than listed in the ingredients if you want it to be soupy, add less if you want it to be stewy.
7. Add diced tomatoes (including liquid).
8. Crank the heat up and bring to a boil, then turn down the heat, put the lid on, and let it simmer for a half an hour to 45 minutes (with the rice, cook for longer).
9. Add beans.
10. Add corn.
11. Add veggie/soy taco filling and...
12. Add more vegetable broth/water if needed.
13. Cook for 10 to 15 minutes more to make sure the beans are cooked.

Serve with cheese, sour cream, salsa or hot sauce, cornbread, avocado — whatever you like — or nothing!

Tuesday, January 3, 2012

Vodka penne

This is such an amazing recipe that to this day, members of my family fight over who discovered it. In any case, it's from Patricia Wells' Trattoria, and it's delicious. Best part? At only eight ingredients, it's simple and cheap. Here's what you need:
Oh, and olive oil.
First, pour some olive oil into a pan. (My mom and I used a pot, but technically, you're supposed to use a large fry pan.) Let it heat up and "when it smells good," add your crushed garlic.
Is there any better smell in the world than garlic frying in olive oil? Non, mis amis.
Before the garlic browns, add some crushed red pepper and a pinch (a small pinch) of salt. Let it sit for just a minute, then pour in a can of crushed or diced plum tomatoes.
Action shot!
Stir the tomato, olive oil, and spices and let it simmer over medium-low heat while the water boils and you cook the pasta. Make sure it's al dente and not over-cooked. Drain the pasta and add it to the sauce that has been simmering. By now the sauce should be thicker than it was and all the flavors should be best friends with each other. Throw in the pasta and mix it. Add heavy cream and stir.
Smell frequently in order to fully enjoy this.
Throw in a shot of vodka. If you're like my parents, you only have vodka around for this purpose.
More action shots!
Let the alcohol simmer off a little bit before serving. You can add as much pasta as you want, but my grandmother always preferred it with a higher sauce-to-pasta ratio, so that's how my mom makes it. I personally prefer it a little thicker, with more pasta, but it's up to you.

Traditionally, this dish is served without cheese toppings and with parsley or basil on top. Serve it with a crisp white wine or a strong white wine that can stand up to spices.
Yesssssssssssss.
I'm seriously in love with this recipe — I had two servings, and my family and I cleaned our plates with slices of bread and our fingers. (Yes, we almost reduced ourselves to licking our plates.)

Vodka Penne
Ingredients:
1/4 cup olive oil
4 plump garlic cloves, crushed
1/2 teaspoon crushed hot red pepper flakes
Sea salt
28 ounces canned crushed tomatoes
1 pound dried tubular pasta (penne)
2 tablespoons vodka
1/2 cup heavy cream

To make:
1. In an unheated skillet large enough to hold the pasta later, heat olive oil, then add garlic, then red pepper, then salt. Cook over moderate heat just until the garlic turns golden, but doesn't brown, about two to three minutes.
2. Add tomatoes and stir to blend. Let it simmer uncovered until the sauce begins to thicken.
3. In a large pot, boil water and cook the pasta until it's tender but firm to bite.
4. Drain the pasta, then add it to the skillet with the tomato sauce.
5. Add cream and toss.
6. Add vodka and toss.
7. Cover, reduce the heat, and let it rest for a few minutes so the pasta can absorb the sauce.
8. Transfer to warmed shallow pasta bowls and serve immediately, with parsley on top and without cheese.
9. Bask in the praise of whomever you're cooking for.

Friday, December 23, 2011

Soup with a built-in bread bowl

A couple nights ago I made this delicious tomato soup at home with my mommy. I found the recipe online a while ago, and it tastes just like the end of tomato soup in a bread bowl. Even better? It's really easy and really quick to make!

Start by chopping up an onion and cooking it in olive oil until it's almost translucent. Add some chili powder, salt, pepper, basil, and three cloves of garlic.
Stir it all together and cook until the garlic is slightly browned. When it's looking tasty, add a splash of vegetable or chicken stock and a splash of red wine and stir. Drink the rest of the red wine while you're waiting. (Or just add some extra stock instead of the wine.)
While the onion and stock are simmering, dice about half a loaf of Italian bread into about half inch cubes. Don't stress too much about the size; it's all going to be cooked down a bit anyway.

After the onion and stock mix has reached a box, stir it, add two cans of diced tomatoes and stir.
Yum! We let this cook for a bit, then we added in the bread, but it can all be poured in at once.
Bring this to a simmer, and add more spices as needed. Serve in a bowl with mozzarella and fresh torn basil if you have it. (We didn't and it was still absolutely delicious.)

Before I give you the recipe, I should disclose that all the pictures are of a one and a halfing of the recipe, and we had enough for four people and an extra serving for leftovers.

I love this recipe. It's great for a snuggly winter soup — it's quite hearty and very rich.

Ingredients:
1 onion, diced
3 cloves of garlic, crushed and chopped
dash of chili paste (we used chili powder)
splash of chicken stock
splash of red wine
2 cans chopped tomatoes (30 oz total)
leftover bread chunks
sugar to taste
salt and black pepper
fresh basil and grated mozzarella (to garnish)

To make:
1. Heat a small pot; add onion and some oil.
2. Let it soften and cook for a few minutes before adding garlic, chili, and a good helping of salt and pepper.
3. Stir it for a few minutes, until the onions are soft and the garlic is beginning to brown.
4. Add the stock, wine, tomatoes, and bread and keep stirring, letting everything mix thoroughly.
5. Once it's simmered for a couple of minutes, taste and add some sugar if it's too sour or more salt if it's necessary.
6. Serve in a bowl with a good coating of black pepper, mozzarella, and torn basil leaves.